Create VPC and Subnet
- Go to the AWS Management Console
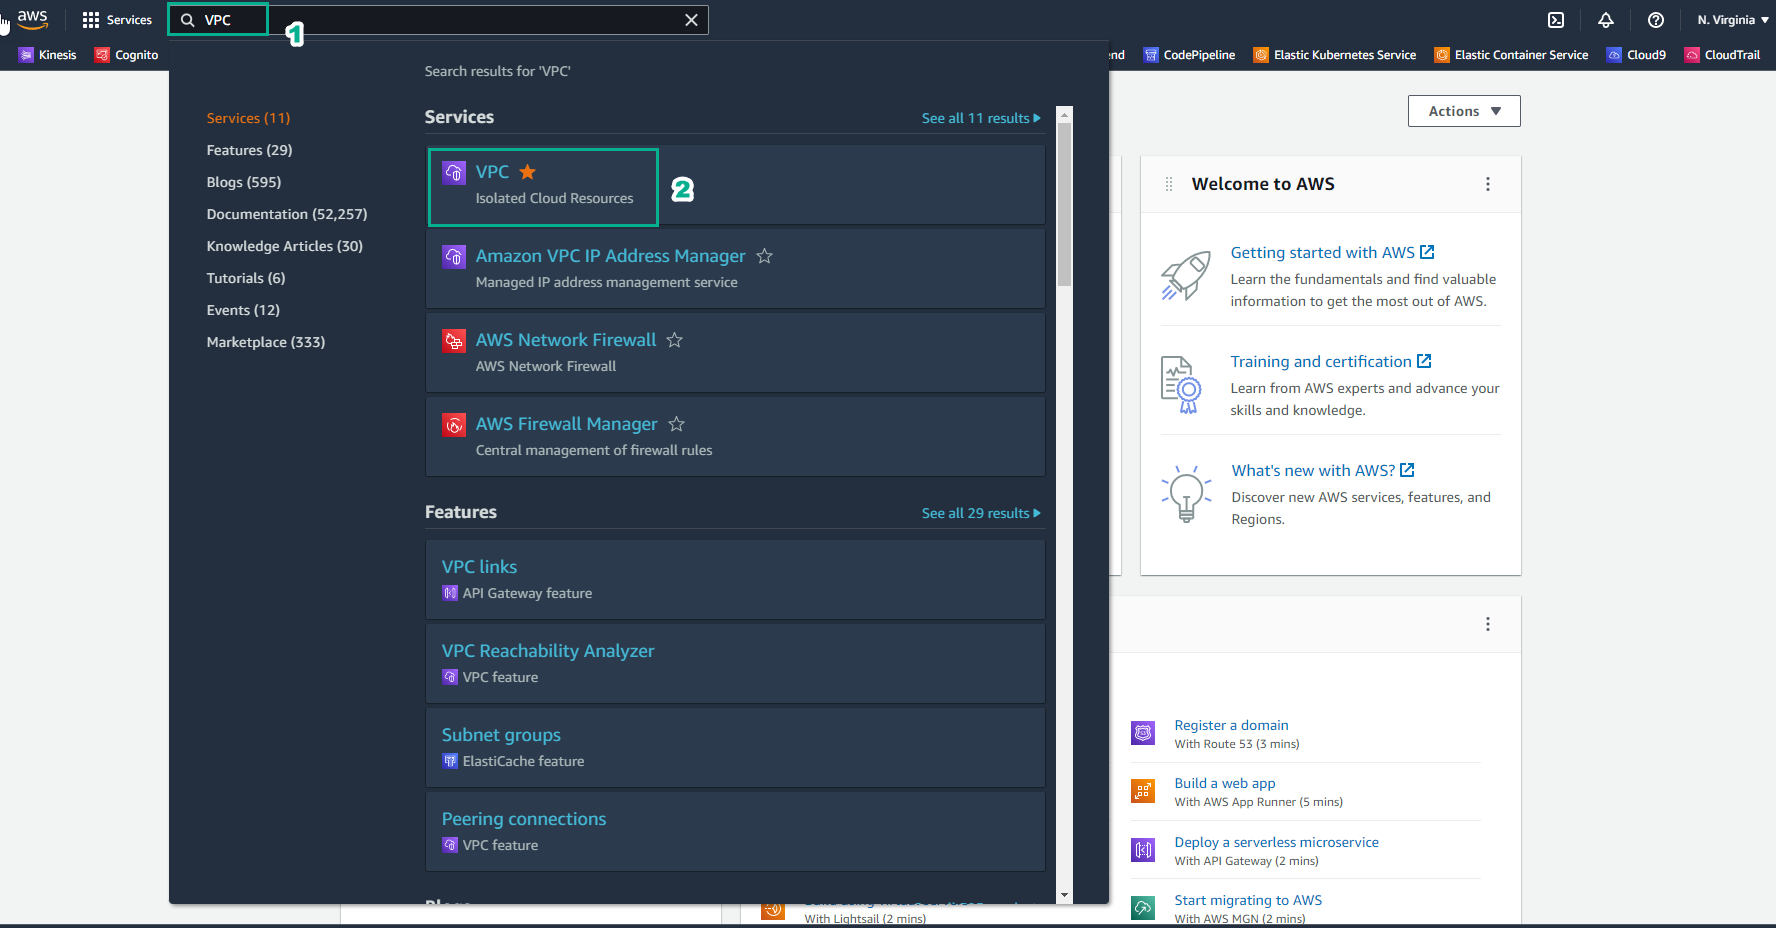
- In VPC interface
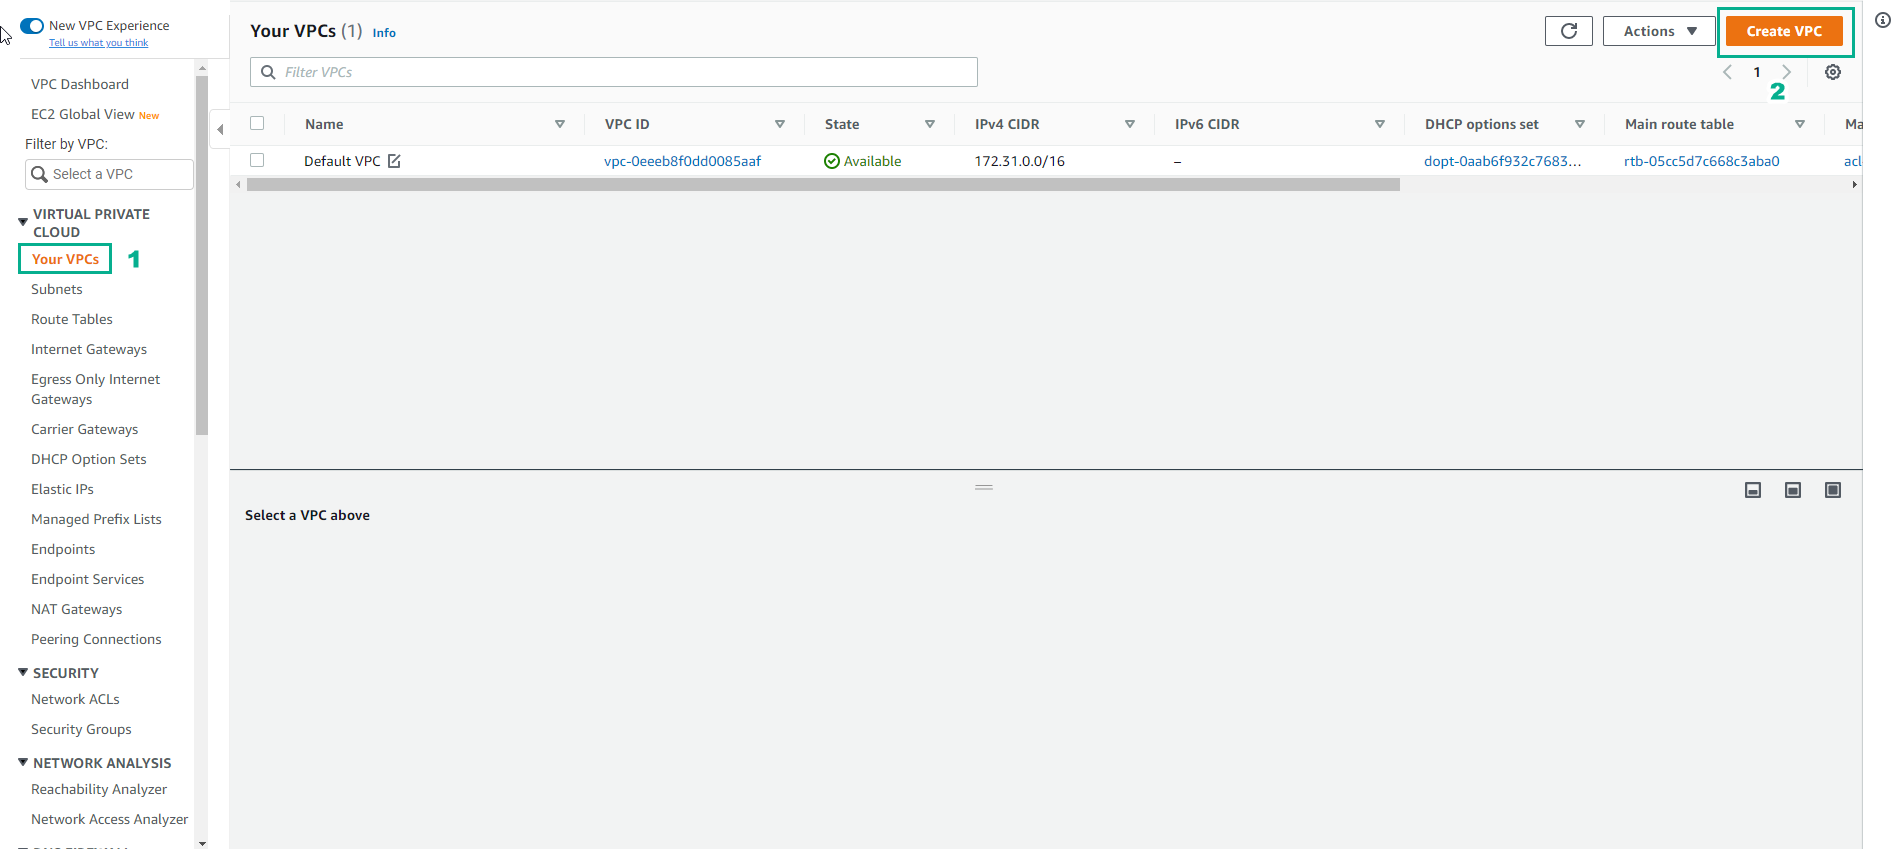
- Select Your VPC
- Select Create VPC
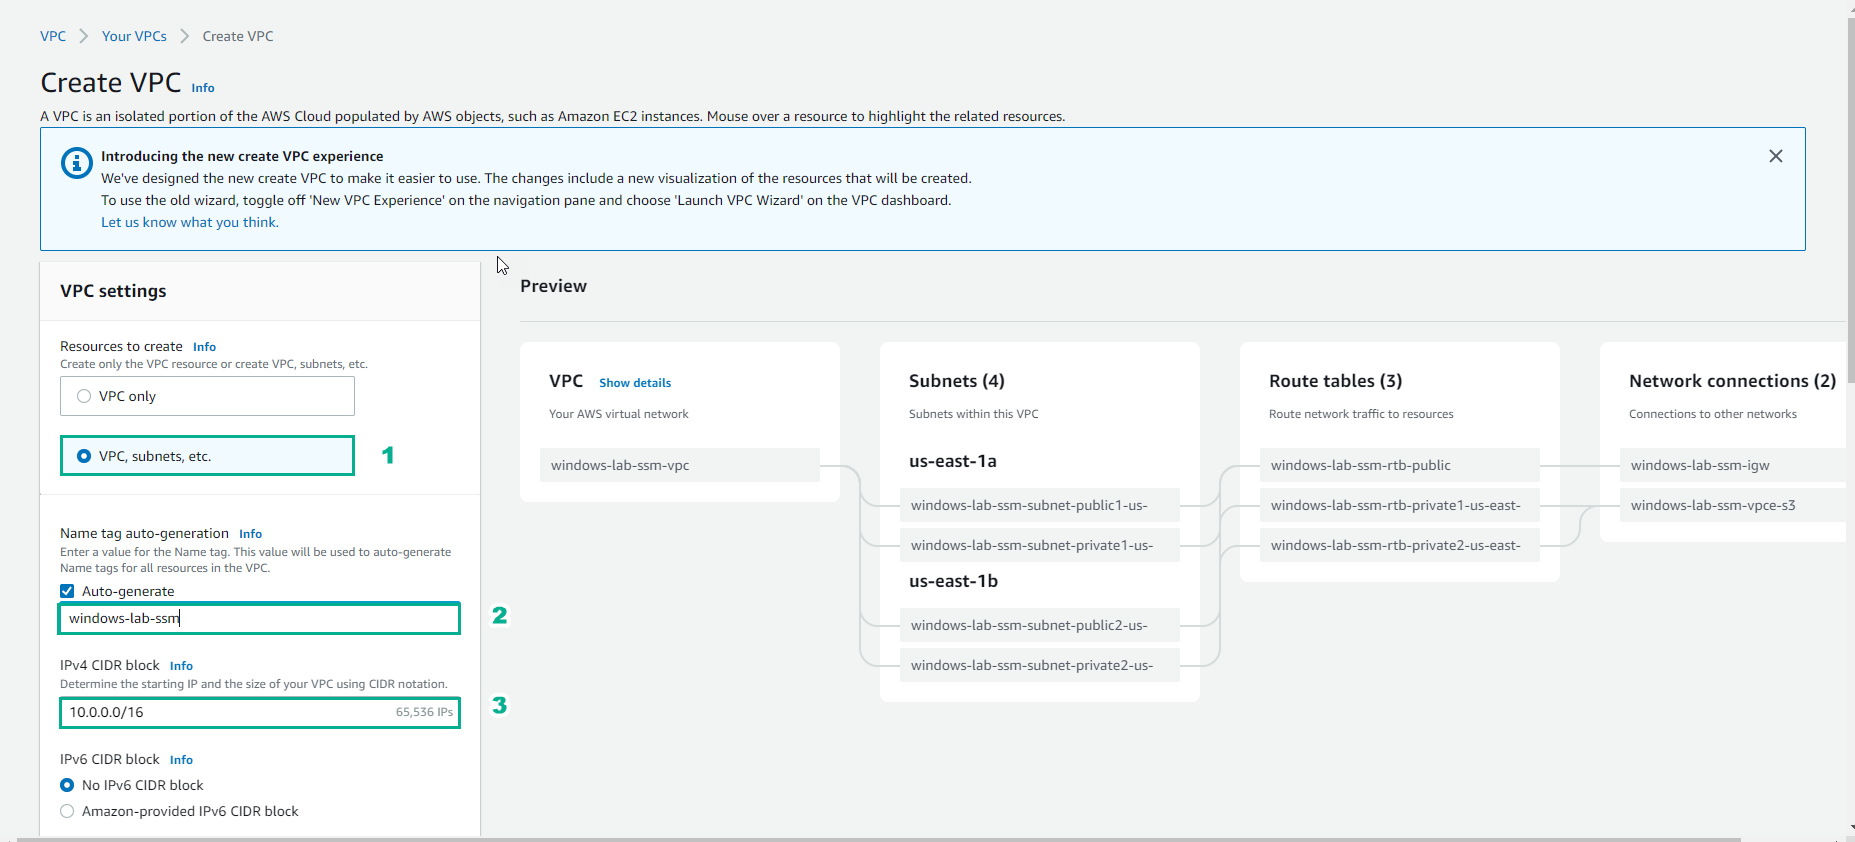
- In the Create VPC interface
- Select VPC, subnet, ect.
- Select Auto-generate
- Type
windows-lab-ssm
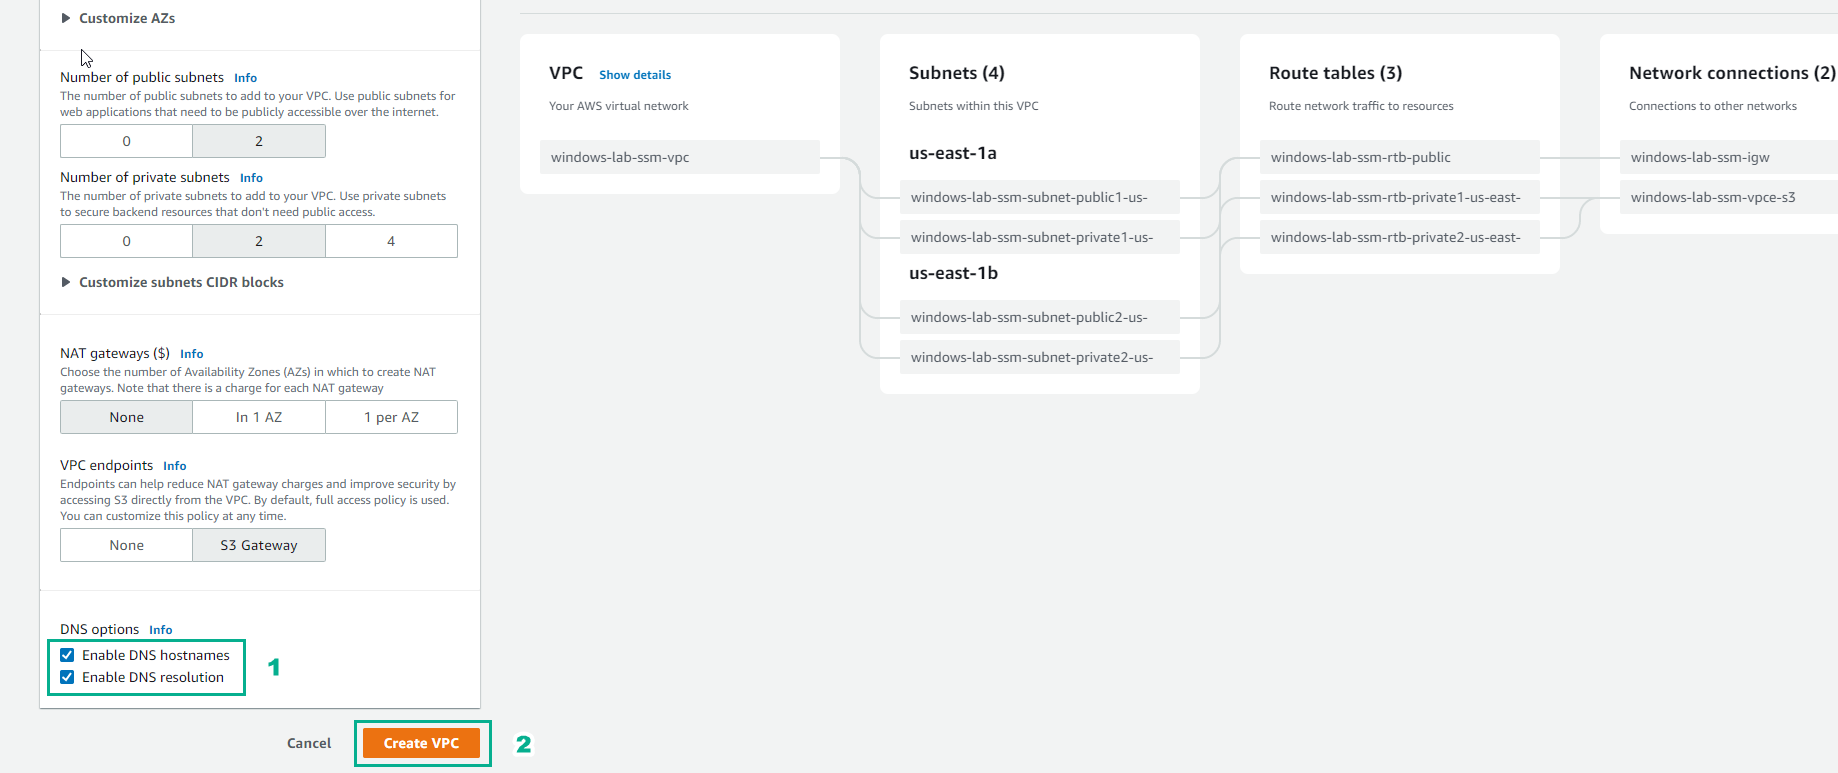
- In the Customize AZs interface
- Choose default values
- Select Enable DNS hostnames
- Select Create VPC
- In the Create VPC workflow interface
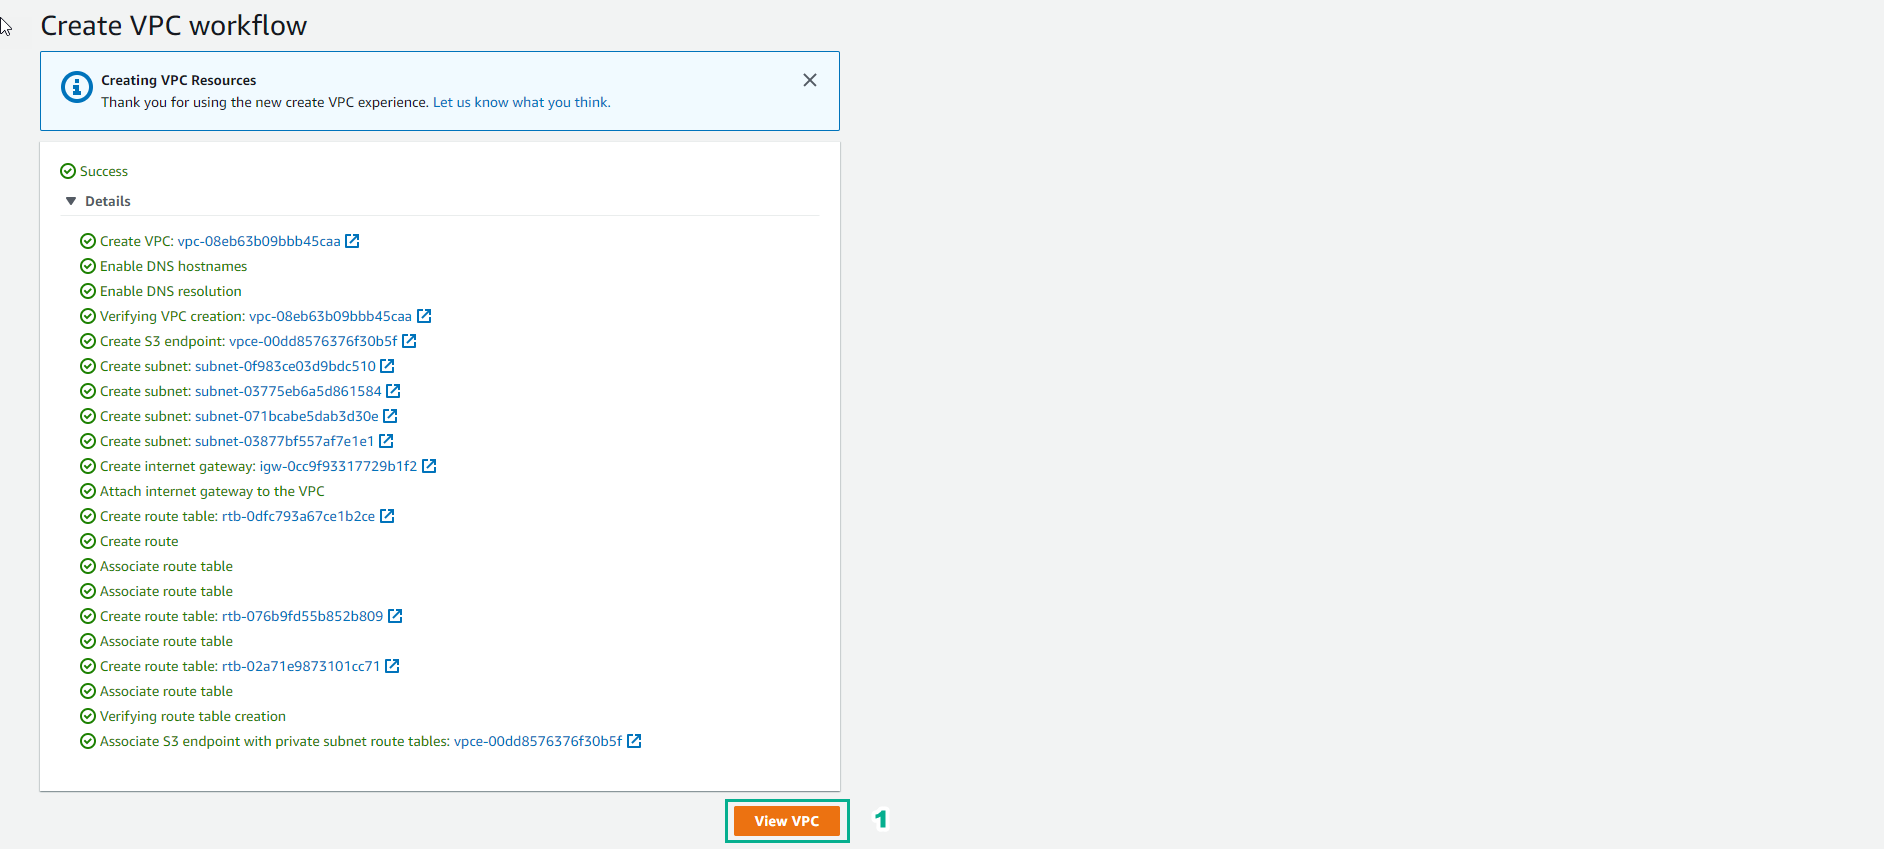
- View details VPC just created
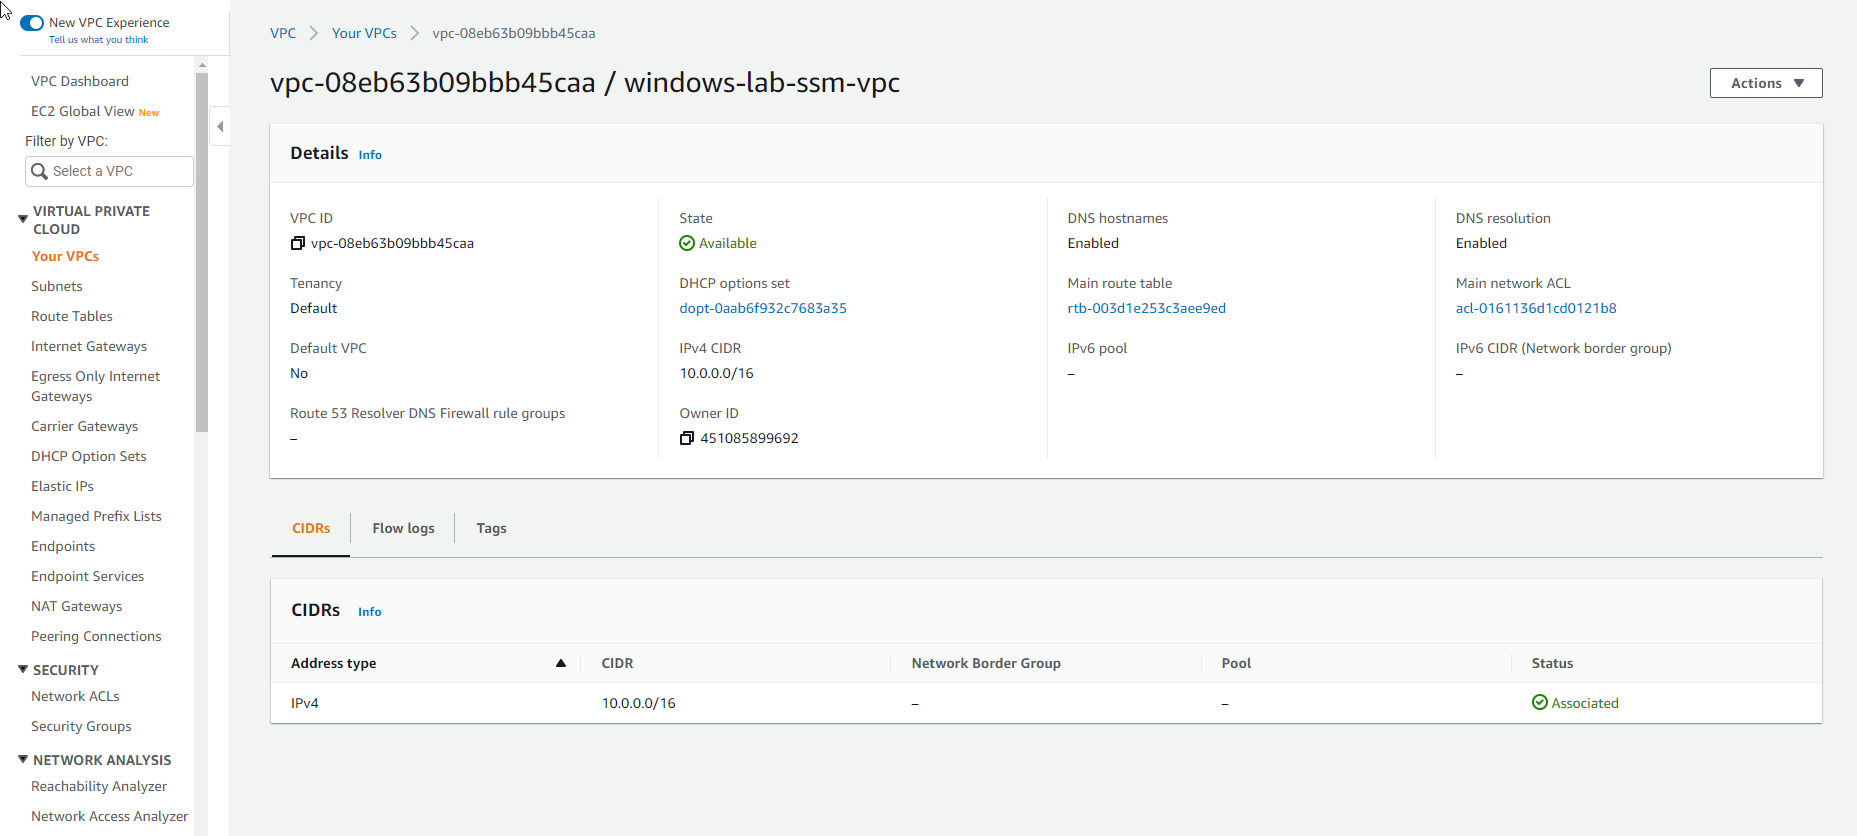
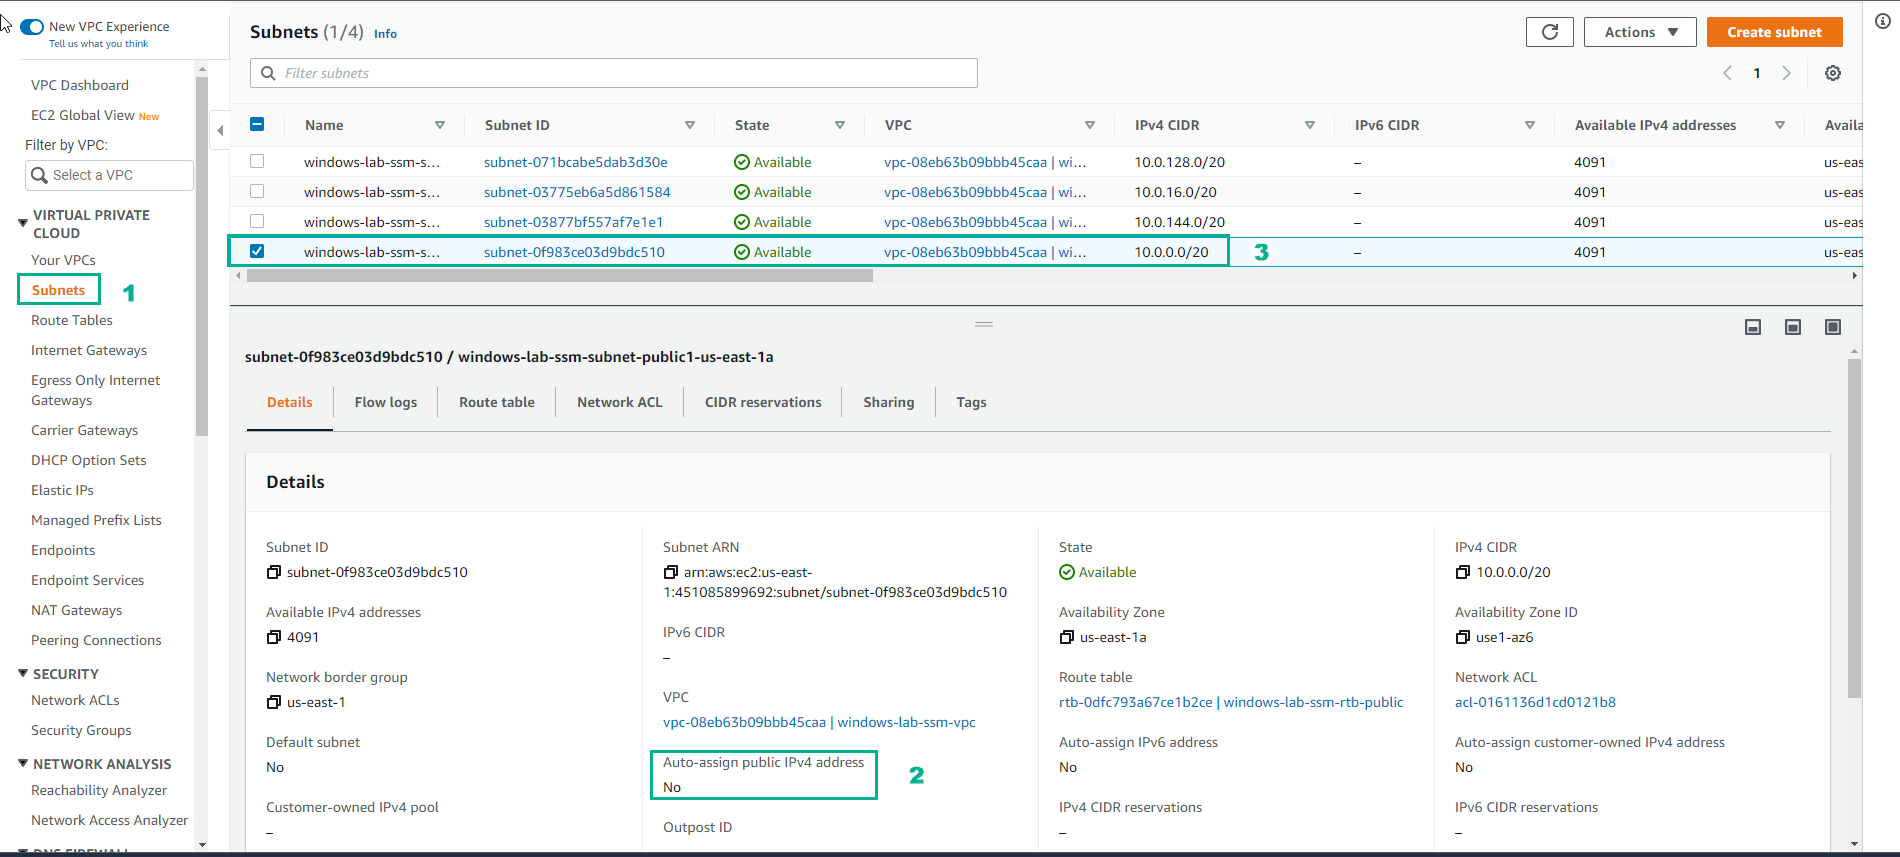
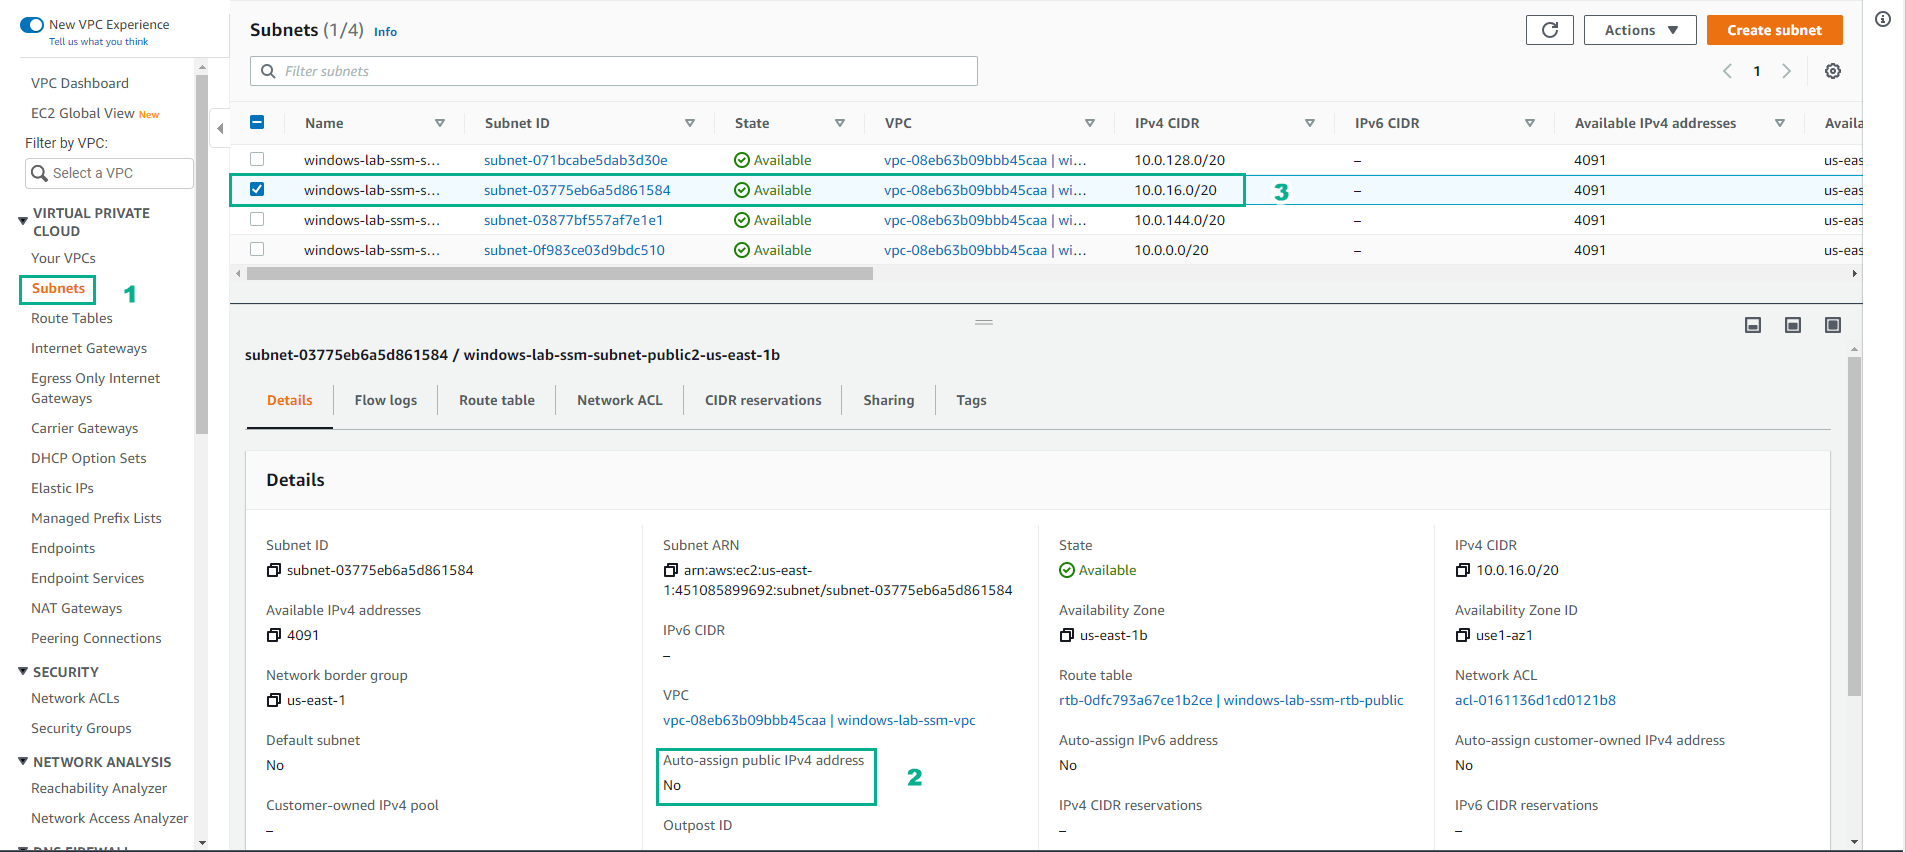
- In the VPC interface
- Select Subnets
- See Auto-assign public IPv4 address
- Select windows-lab-ssm-subnet-public1-us-east-1a
- Select Actions
- Select Edit subnet settings
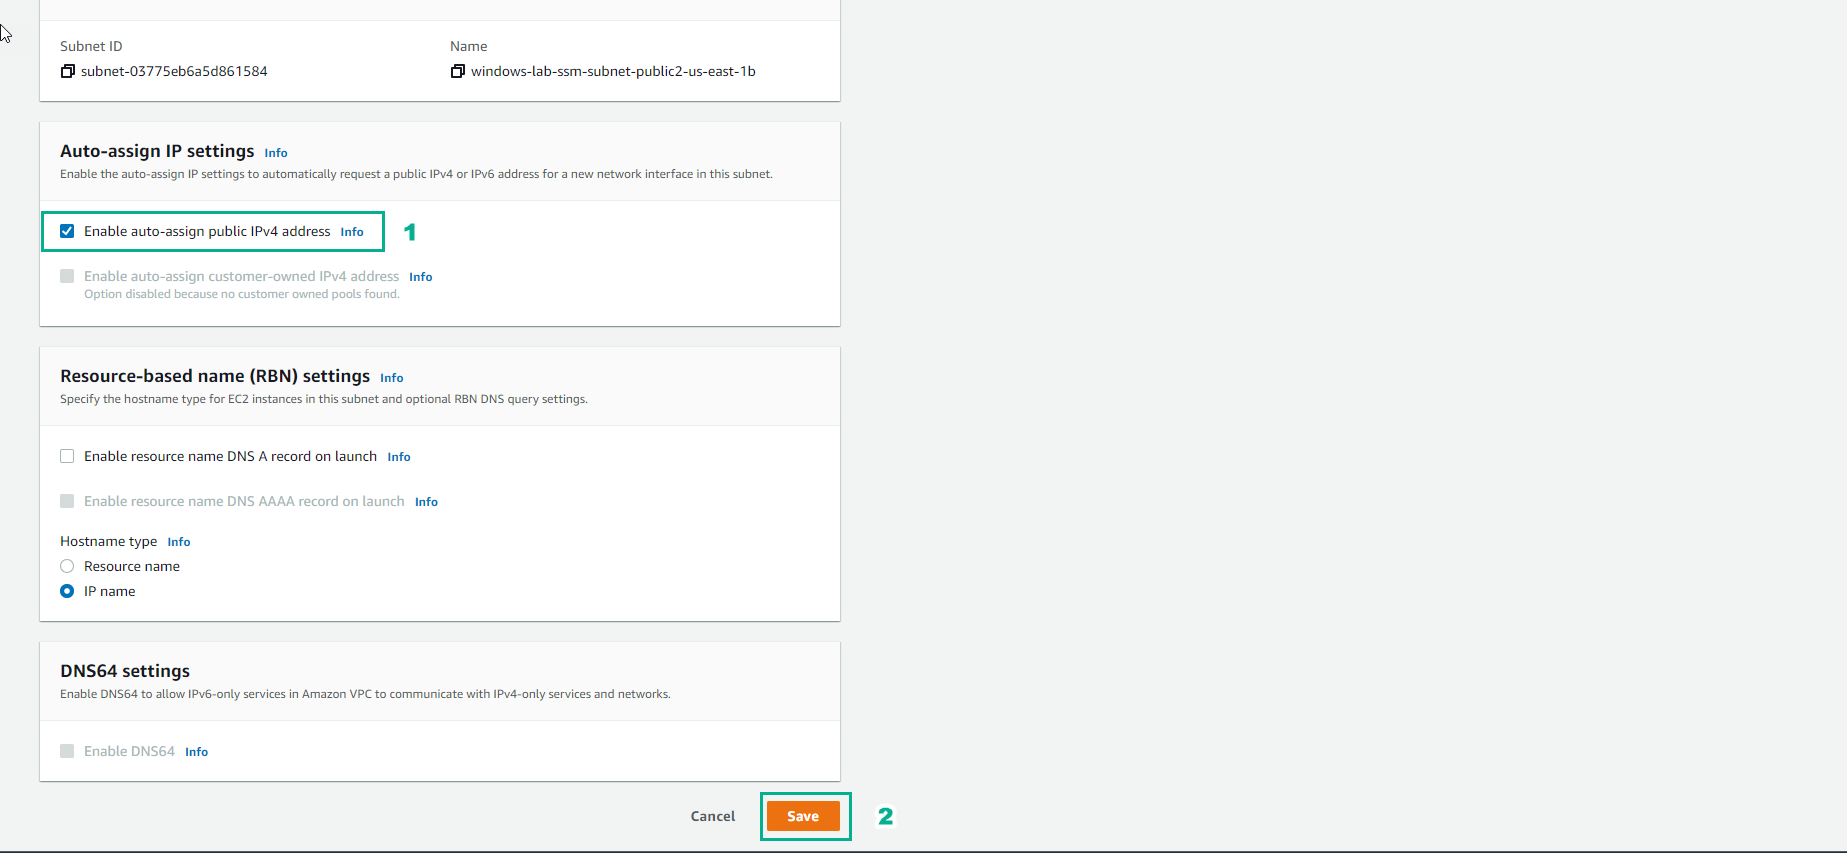
- In the Edit subnet settings interface
- Select Enable auto-assign public IPv4 address
- Select Save

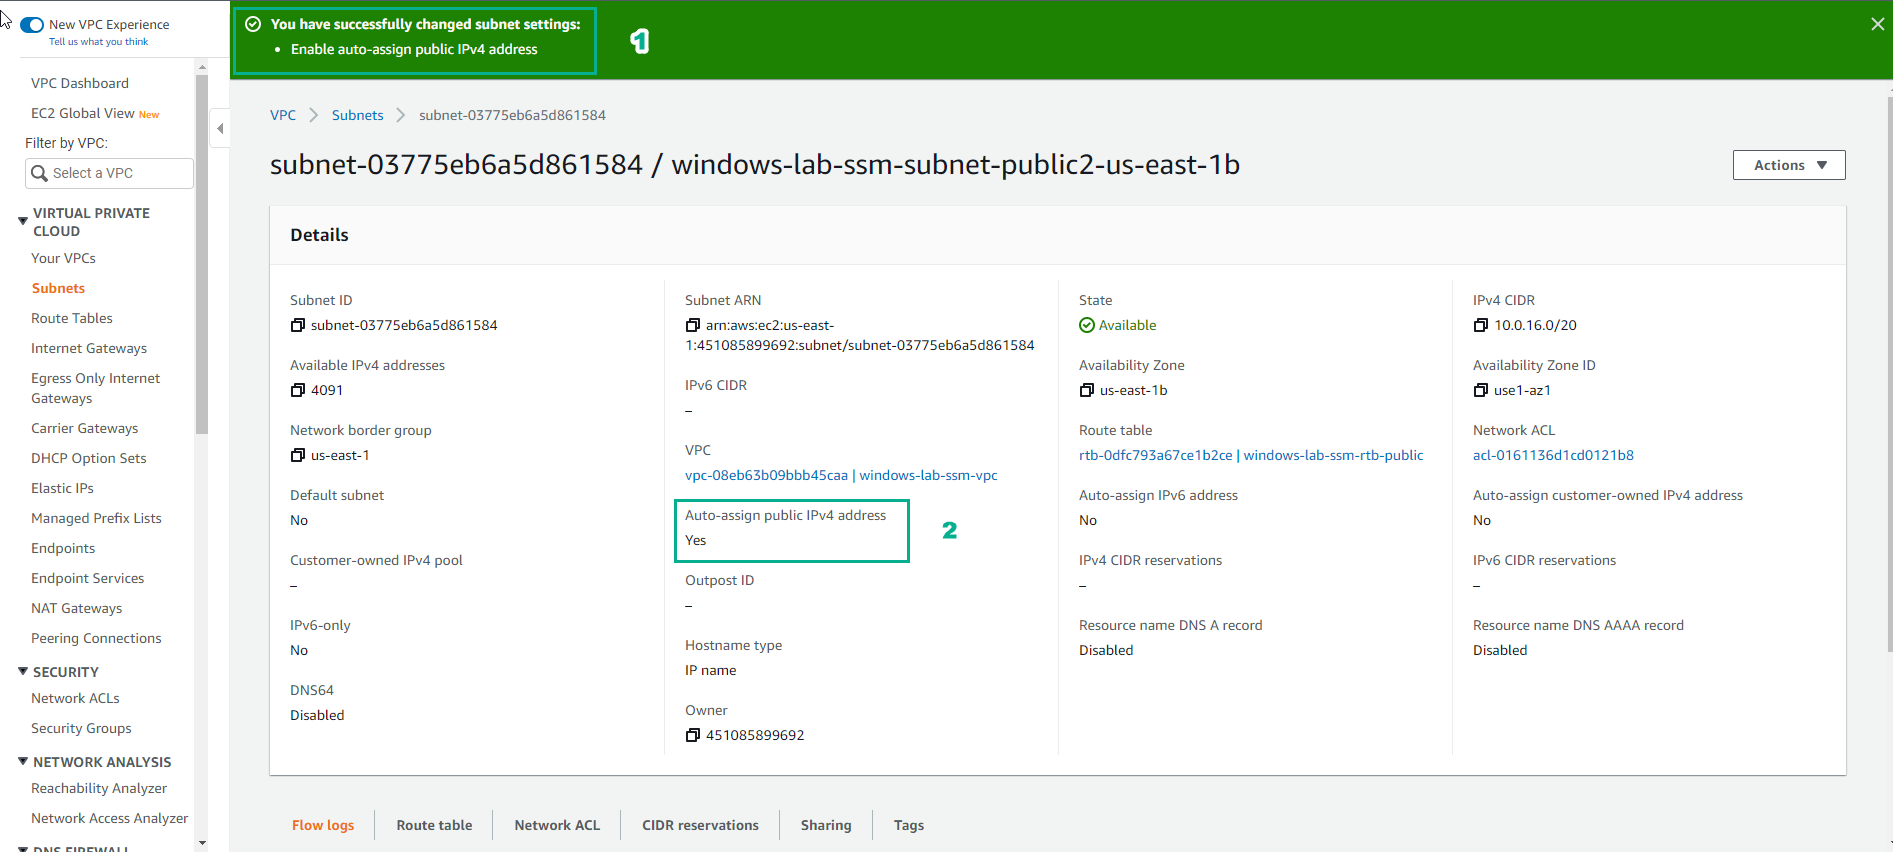
- Enable auto-assign public IPv4 address successfully

- Similar steps are performed with subnet windows-lab-smm-subnet-public-2-us-east-1b
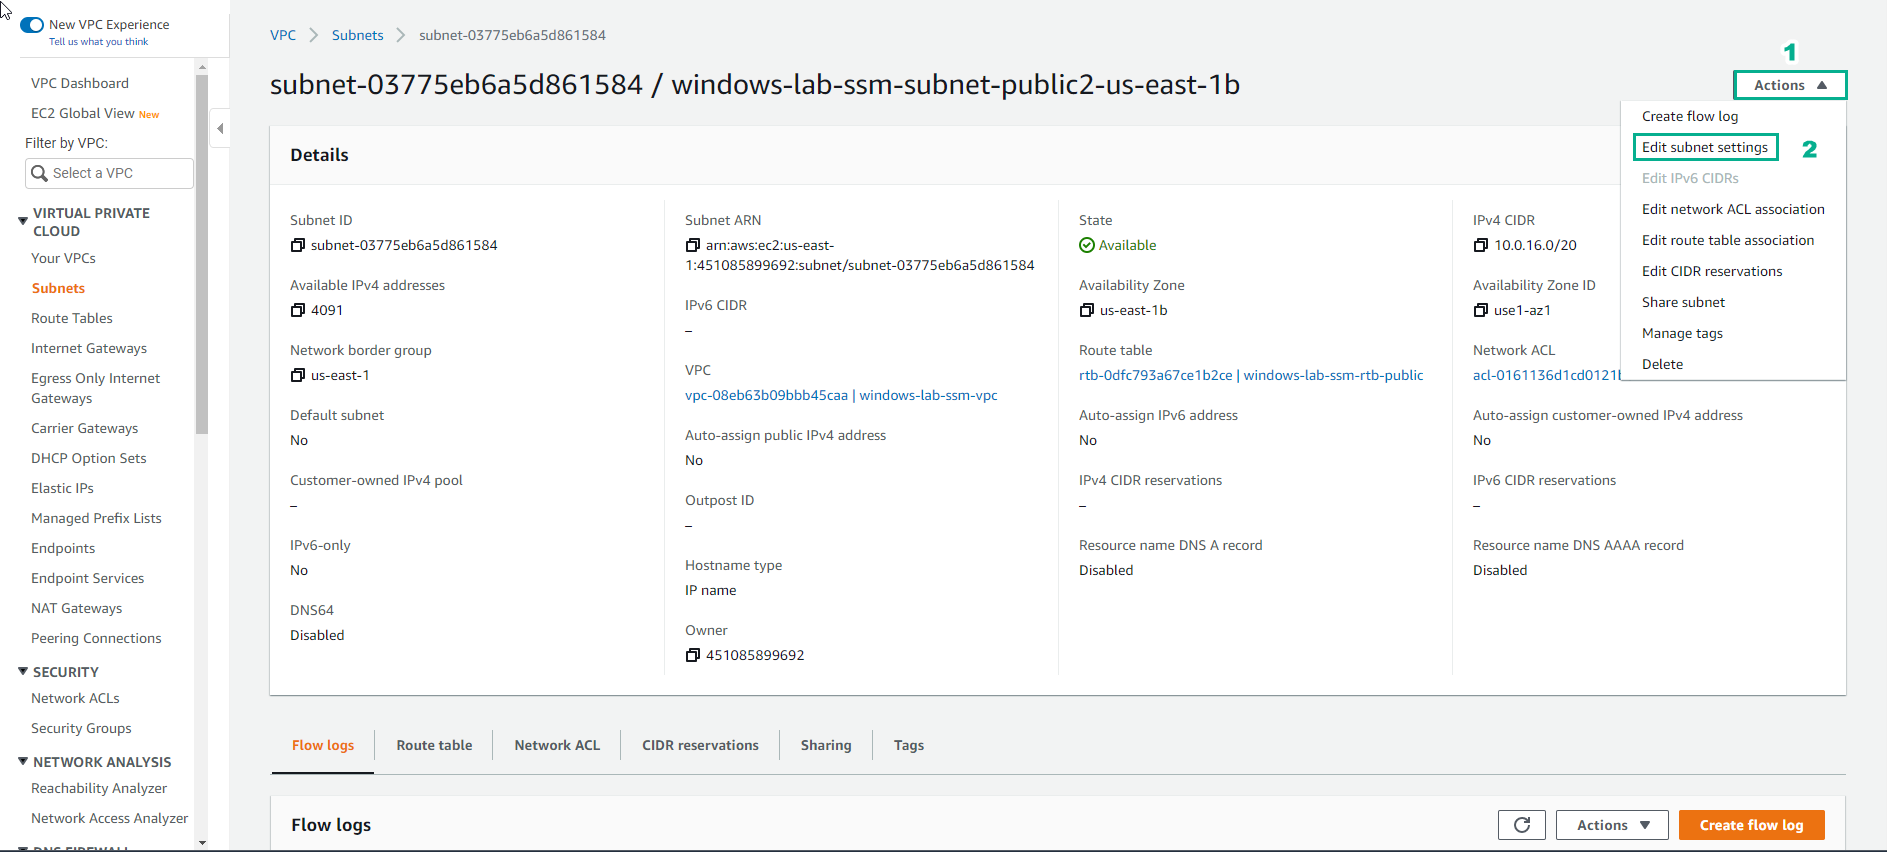
- In VPC interface
- Select Actions
- Select Edit subnet settings
- In the Edit subnet settings interface
- Select Enable auto-assign IPv4 settings
- Select Save
- Enable auto-assign public IPv4 address successfully