Tạo Public Windows EC2
- Truy cập AWS Management Console
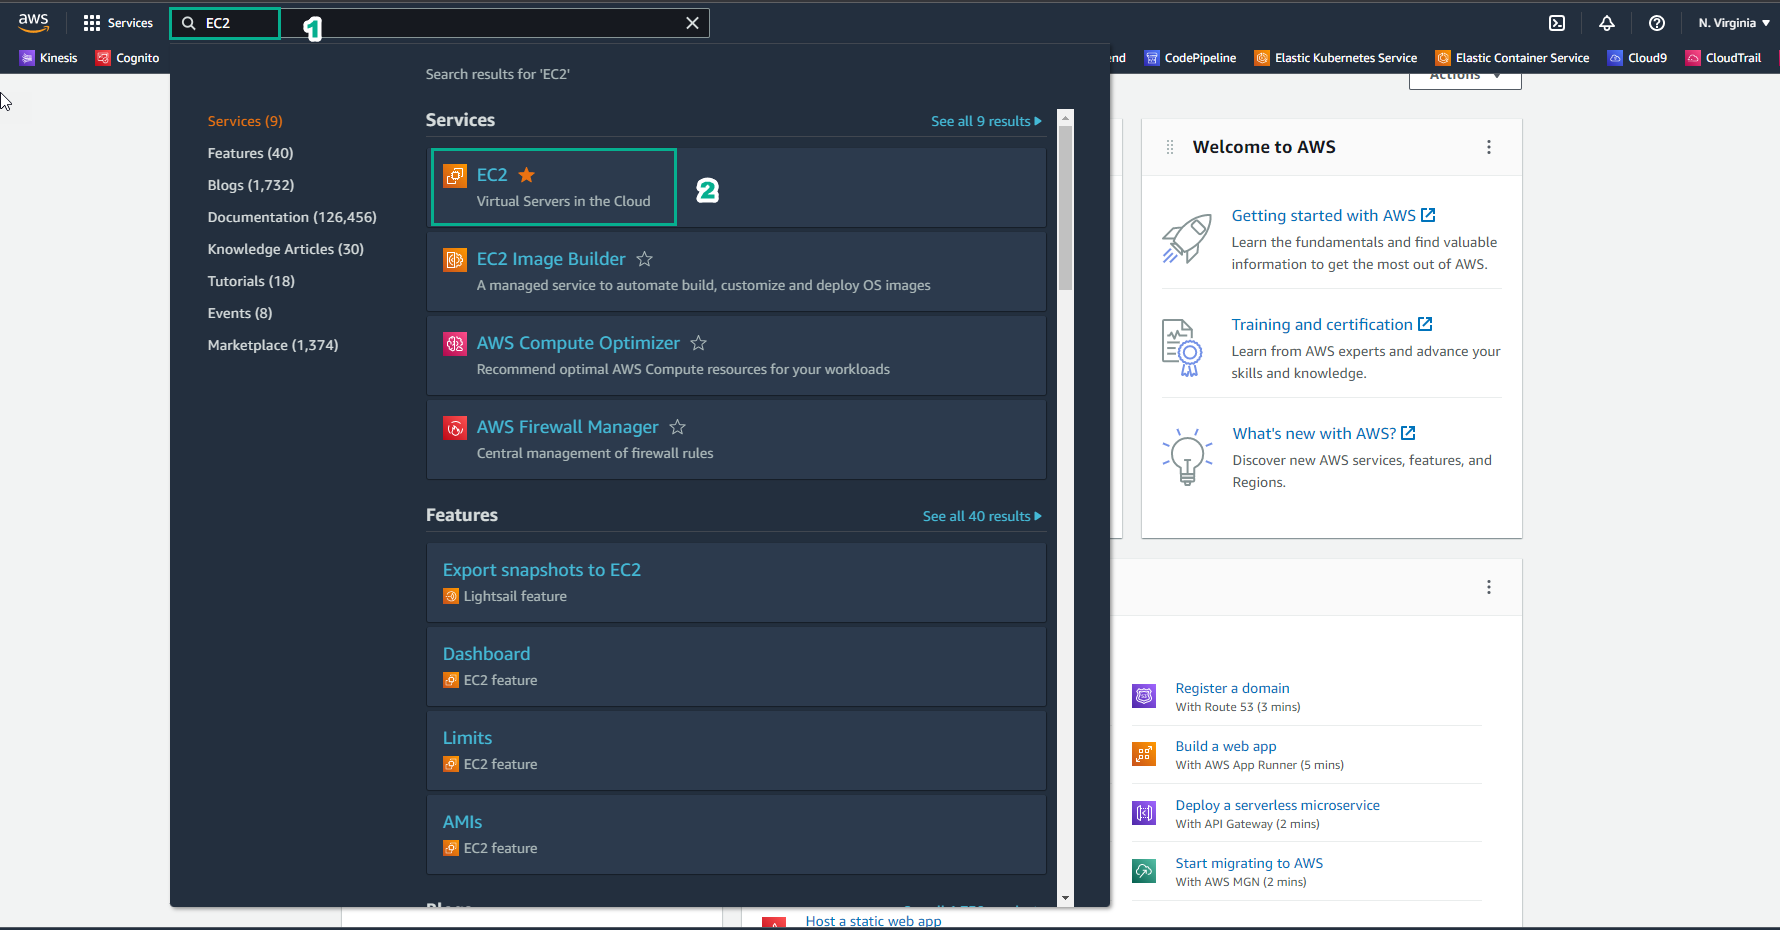
- Trong giao diện EC2
- Chọn Instances
- Chọn Launch instances

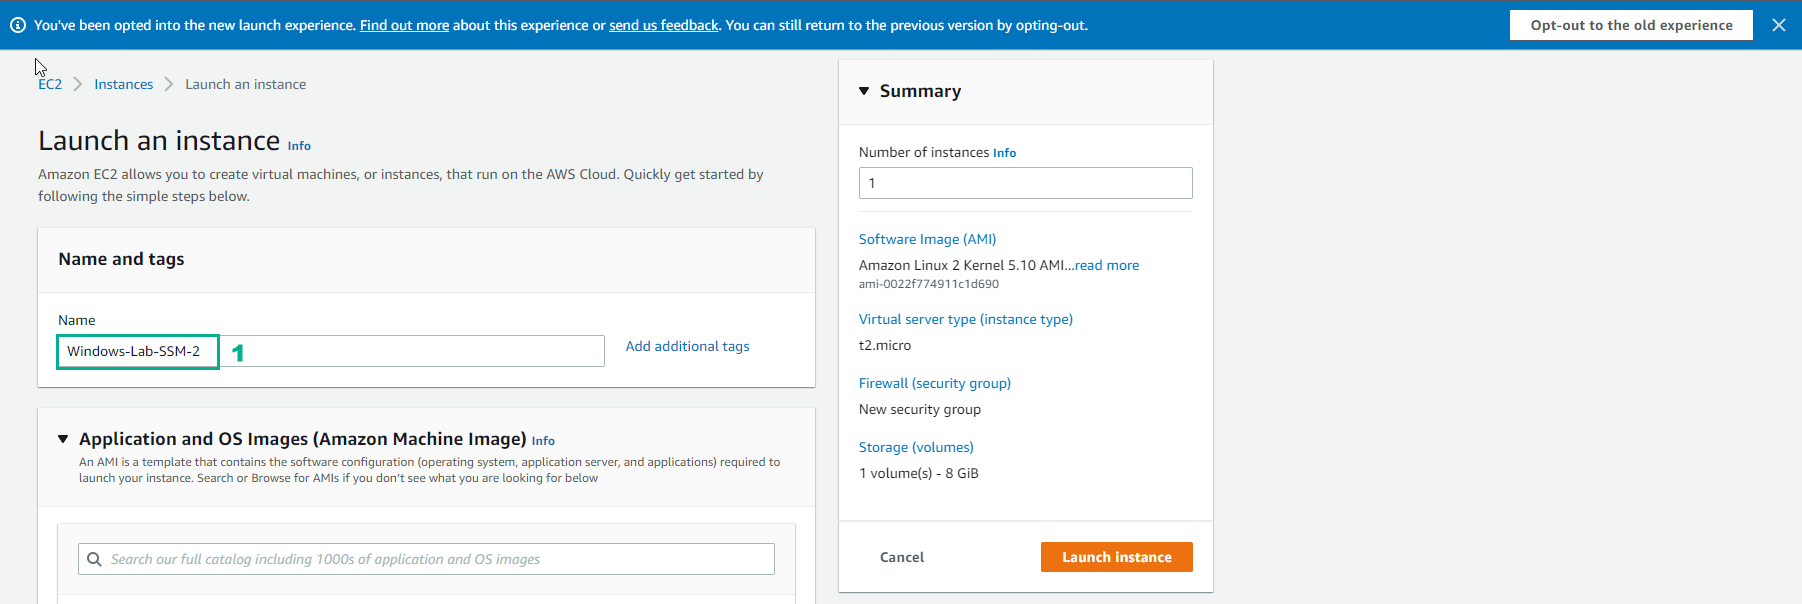
- Trong phần Name and tags
- Name, nhập
Windows-Lab-SSM-1

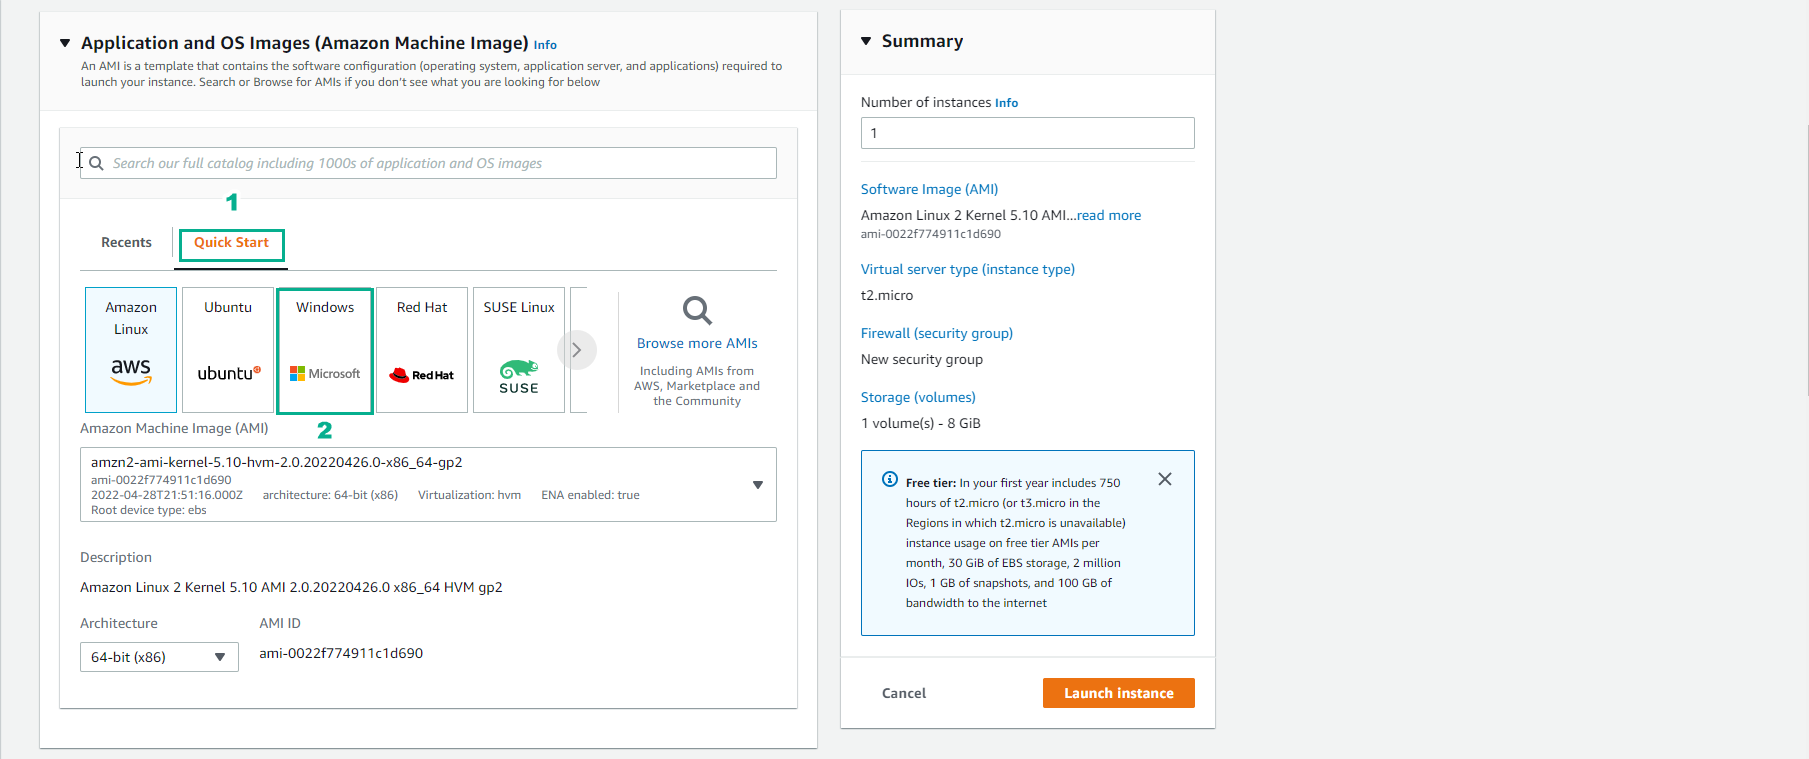
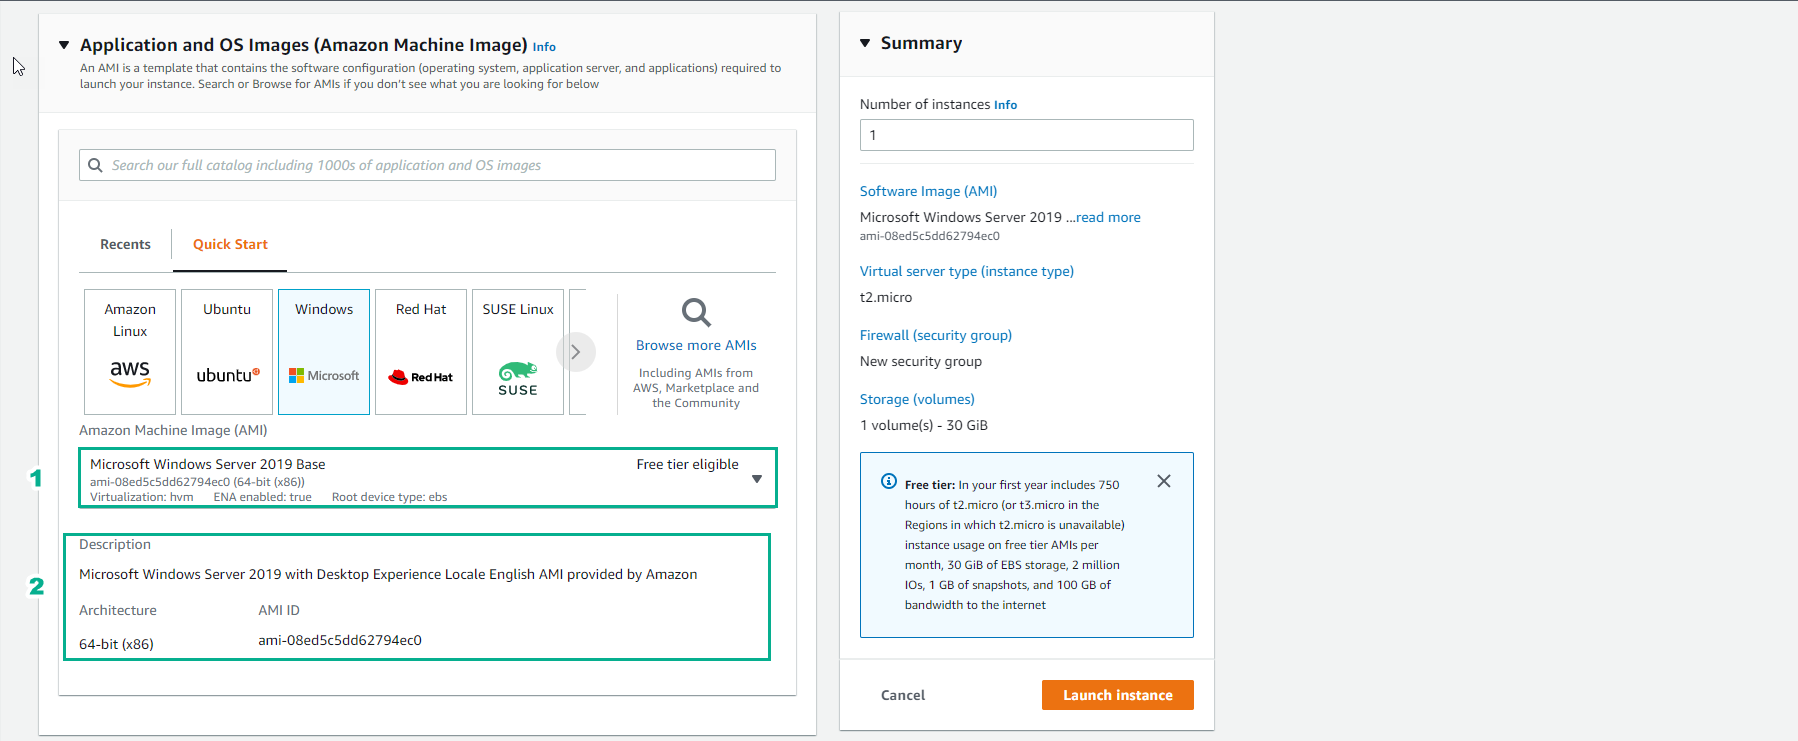
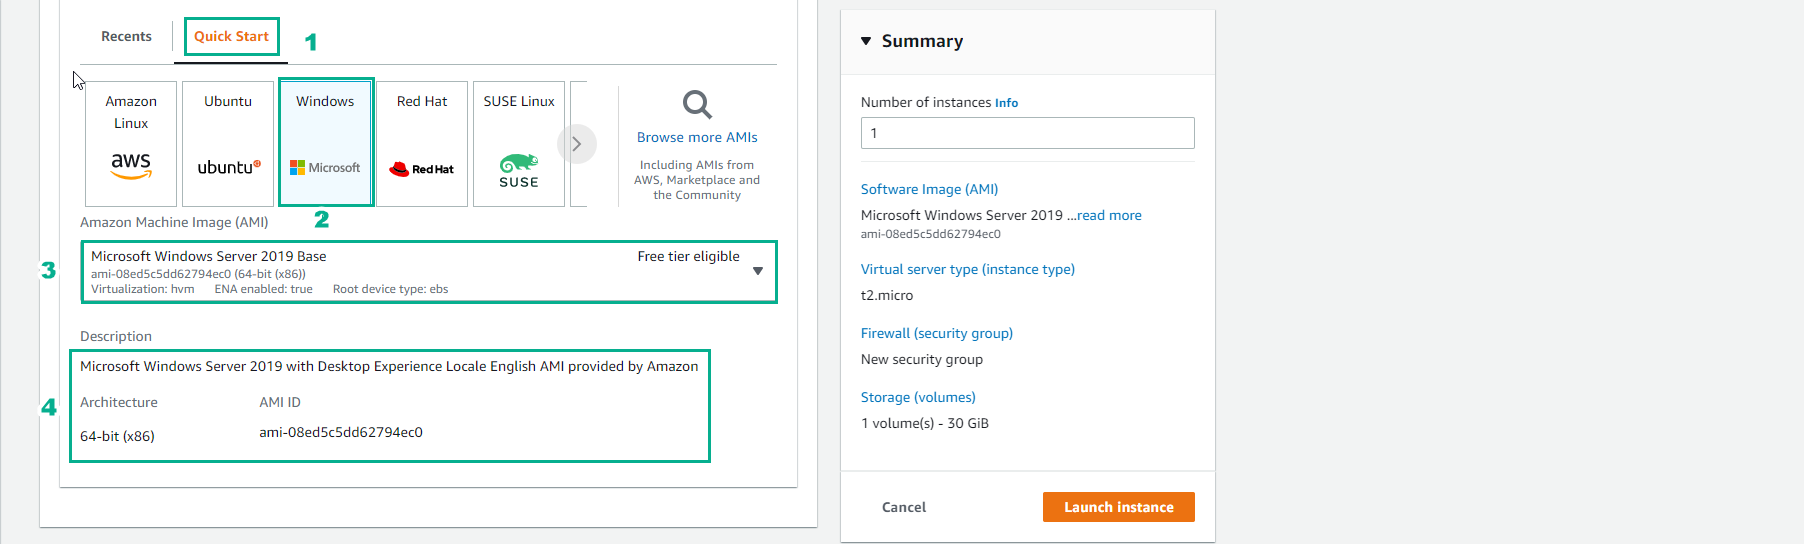
- Trong giao diện Launch Instance
- Chọn Quick Start
- Chọn Windows
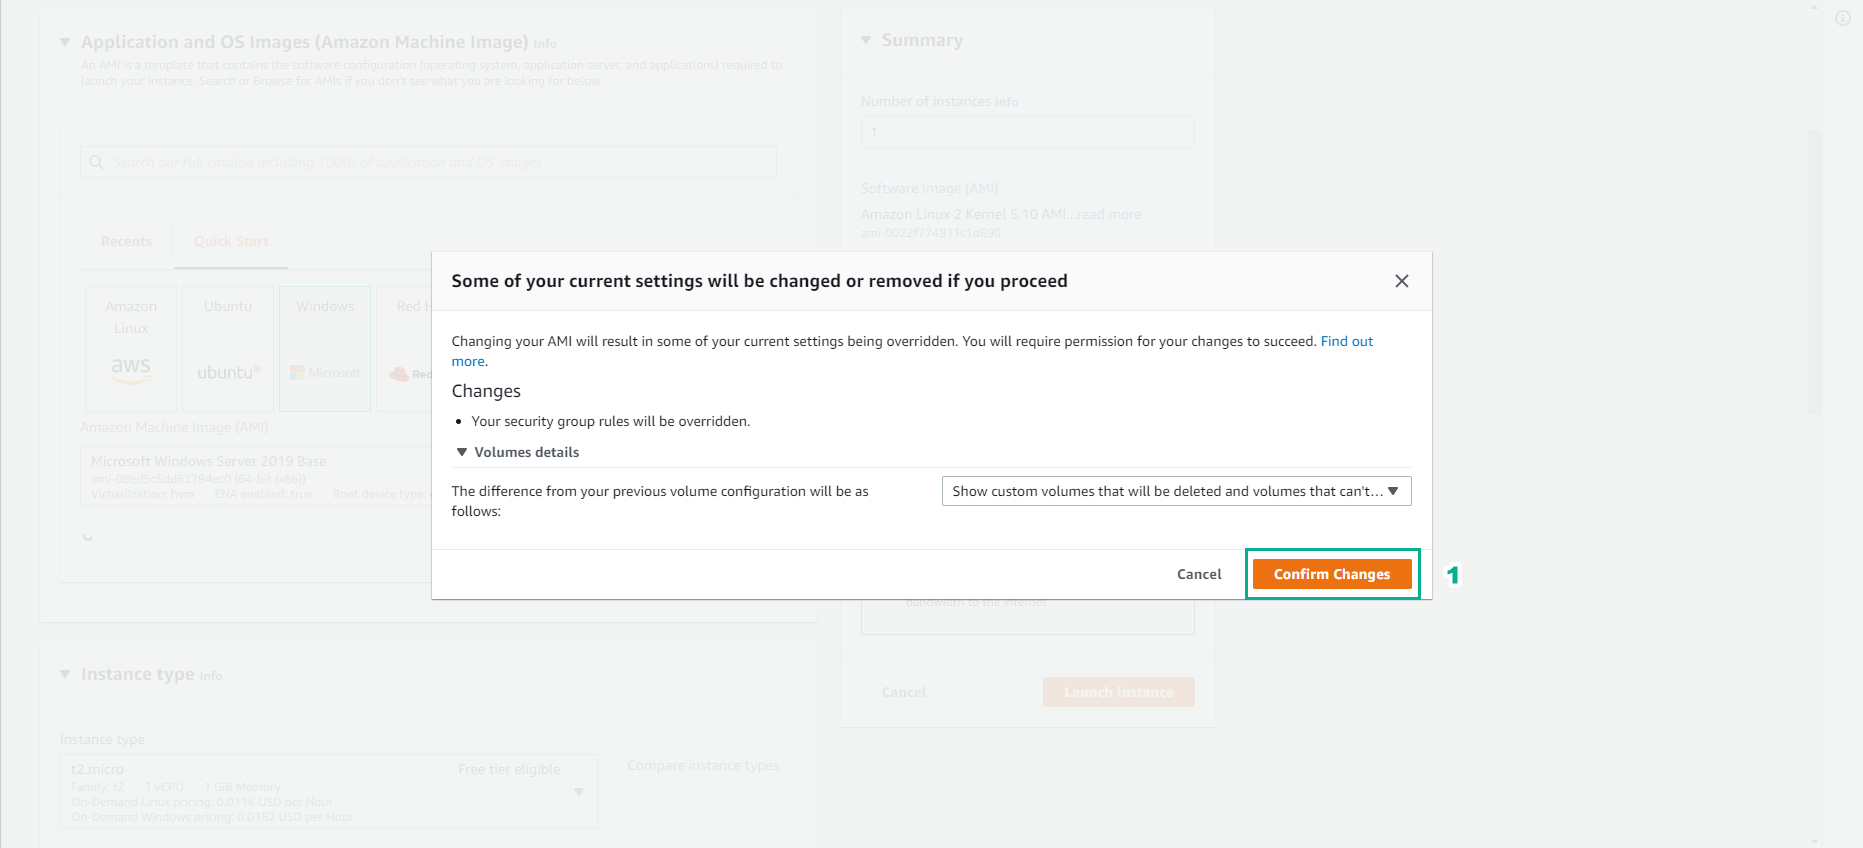
- Chọn Confirm Changes
- Trong giao diện Launch Instance
- Chọn AMI
- Xem mô tả chi tiết
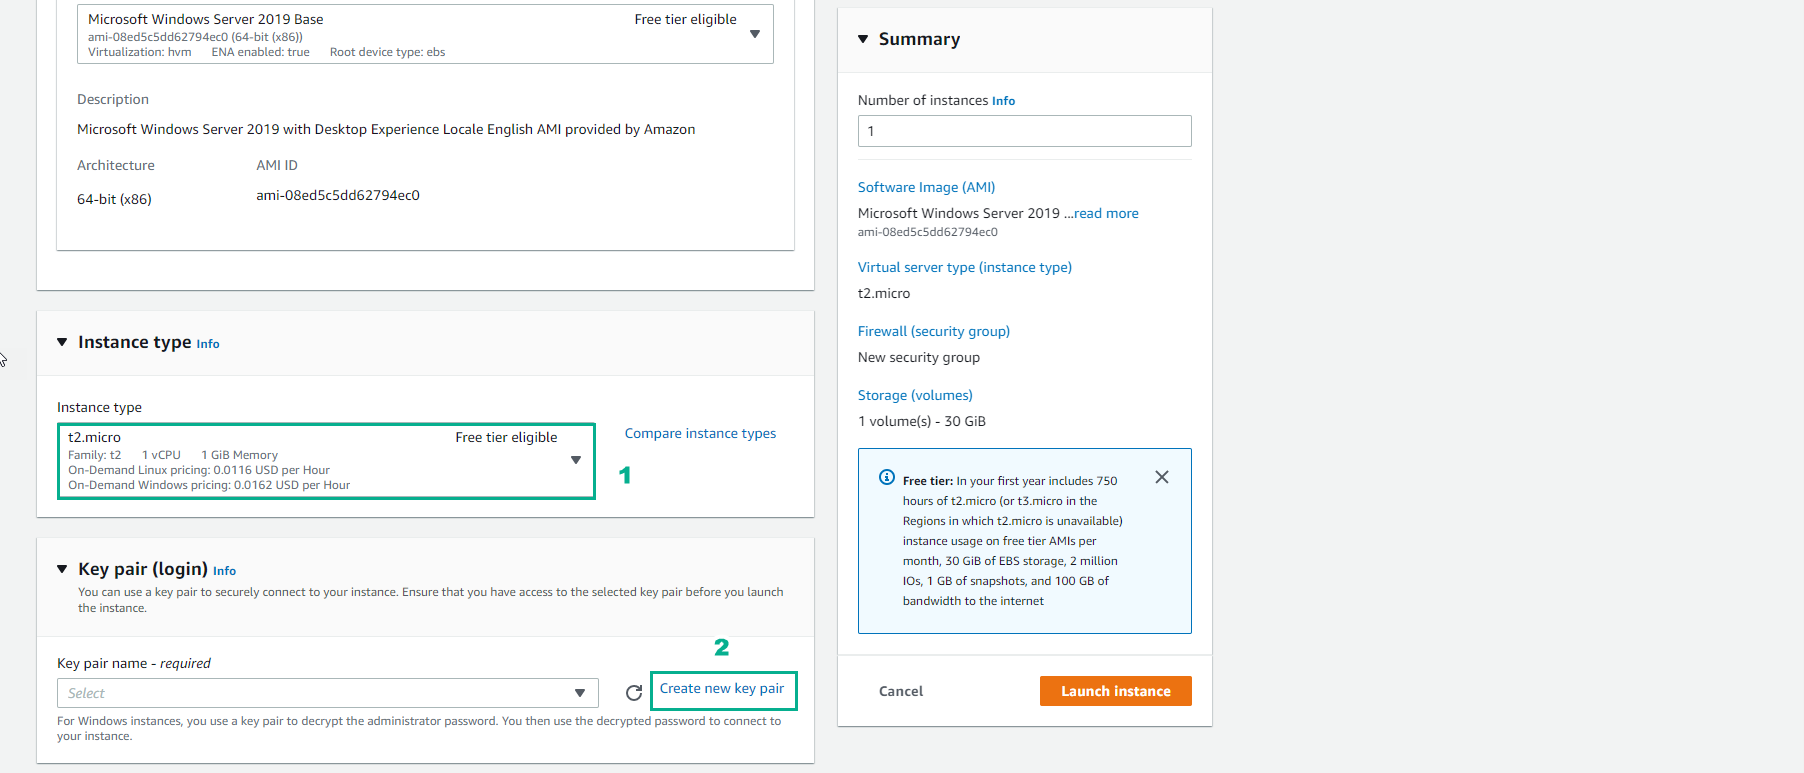
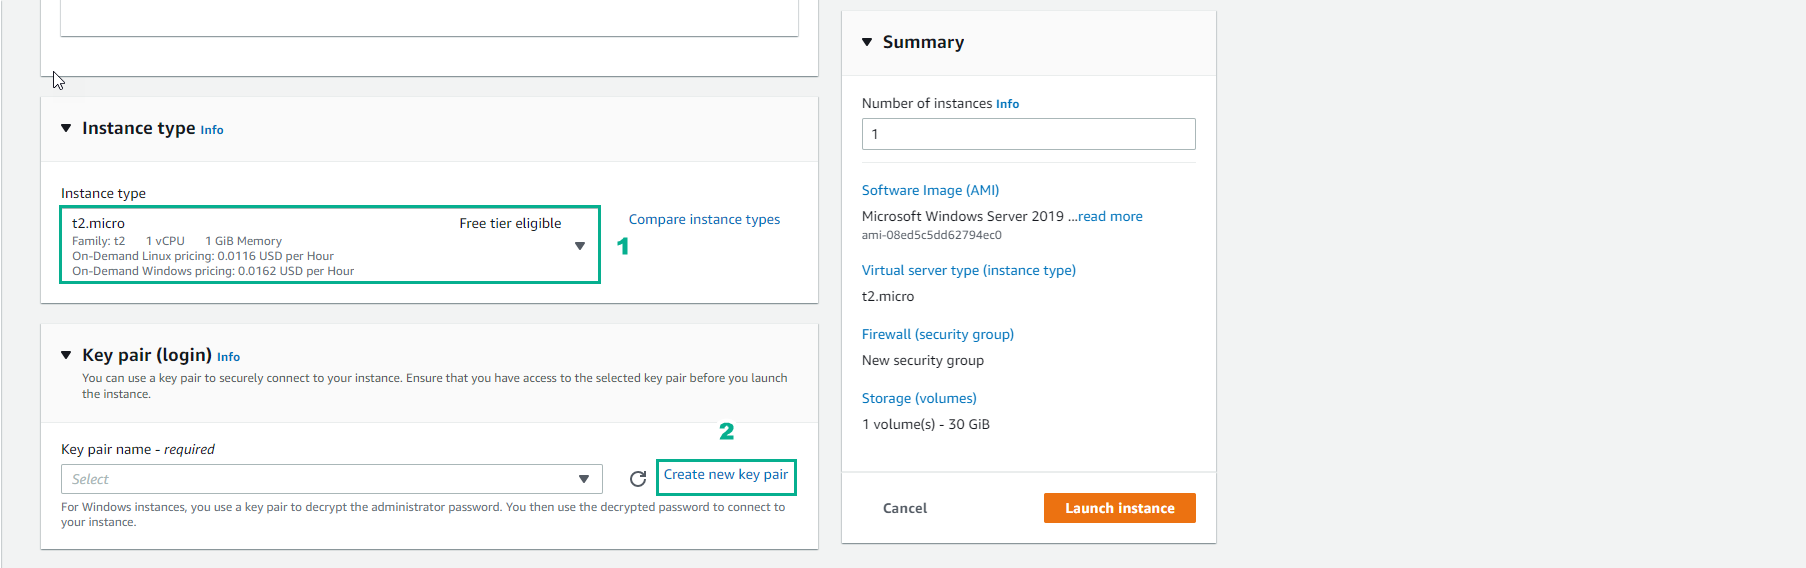
- Tiếp tục trong bước Instance type và Key pair
- Chọn Instance type
- Chọn Create new key pair
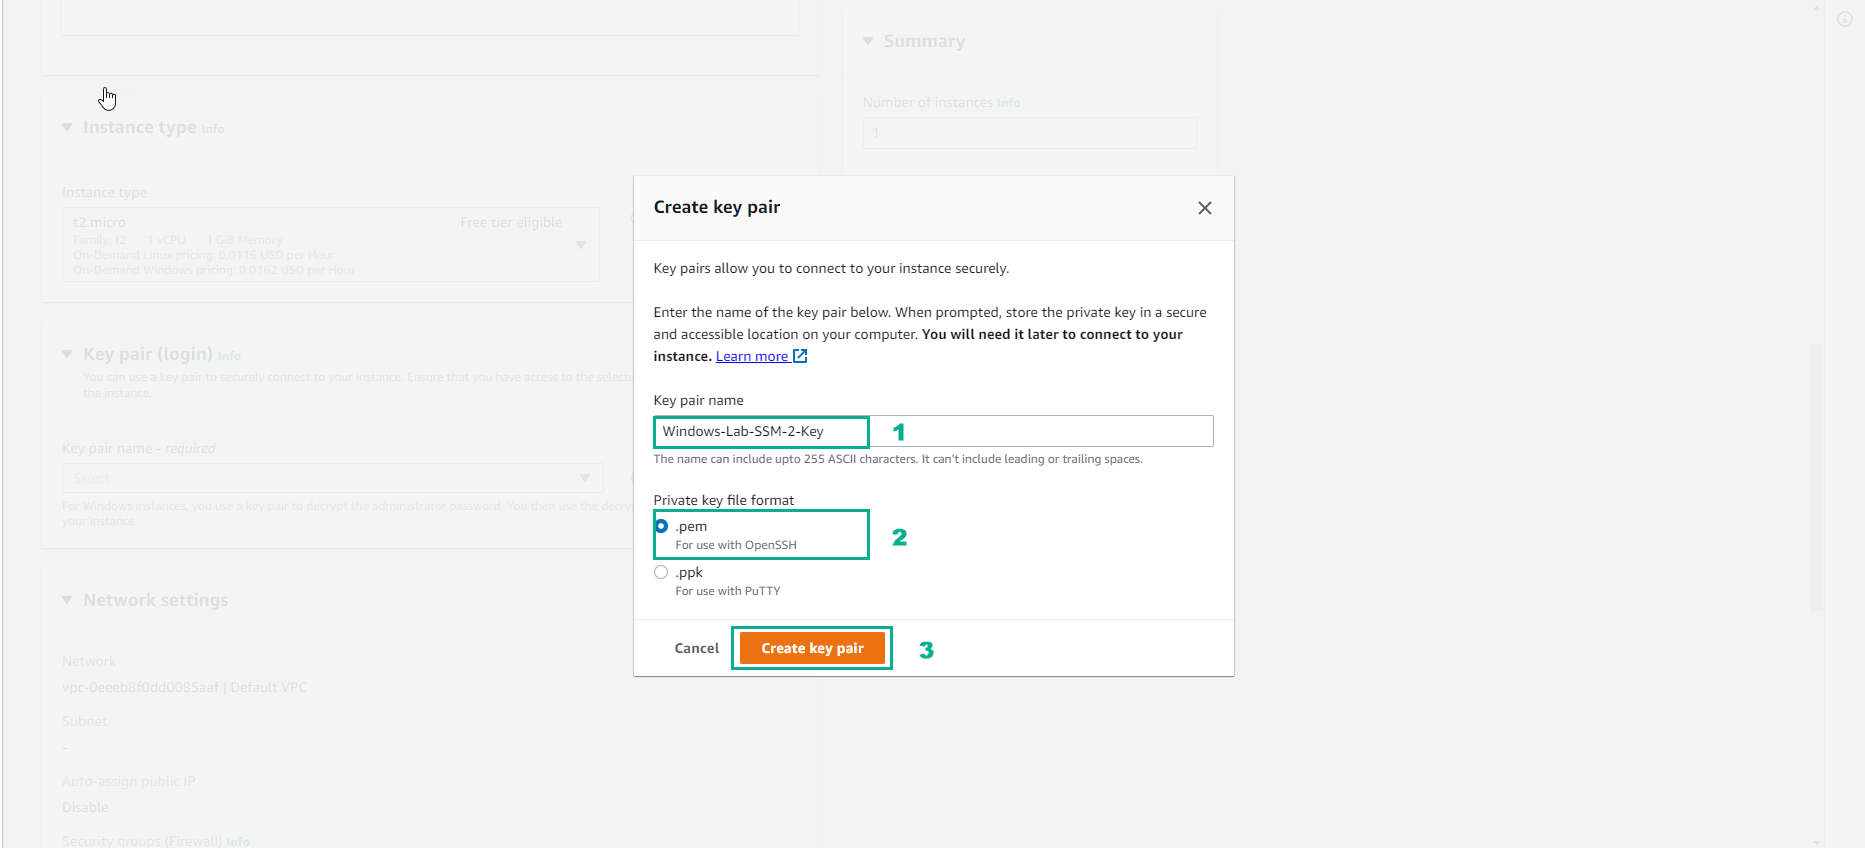
- Trong bước Create key pair
- Key pair name, nhập
Windows-Lab-SSM-1-Key
- Chọn Private key file format .pem
- Chọn Create key pair

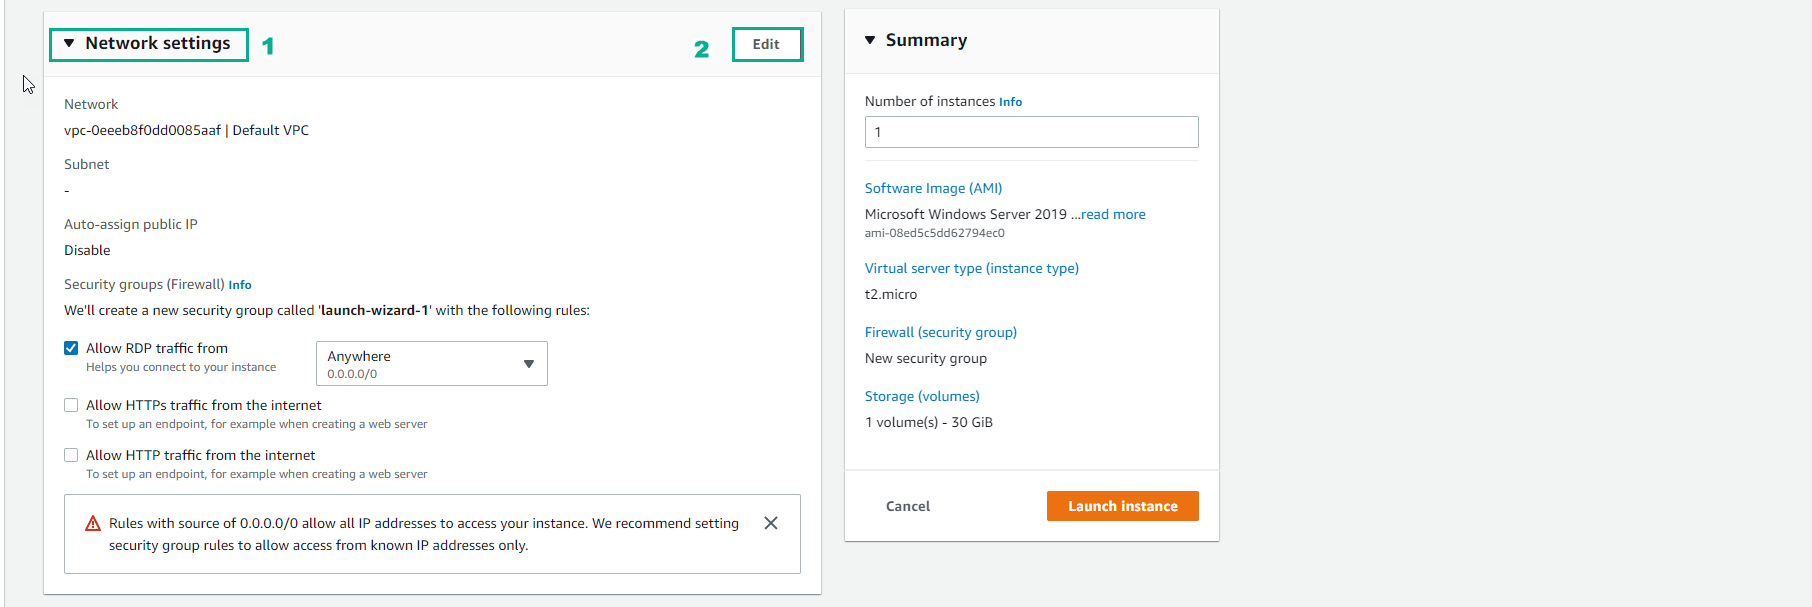
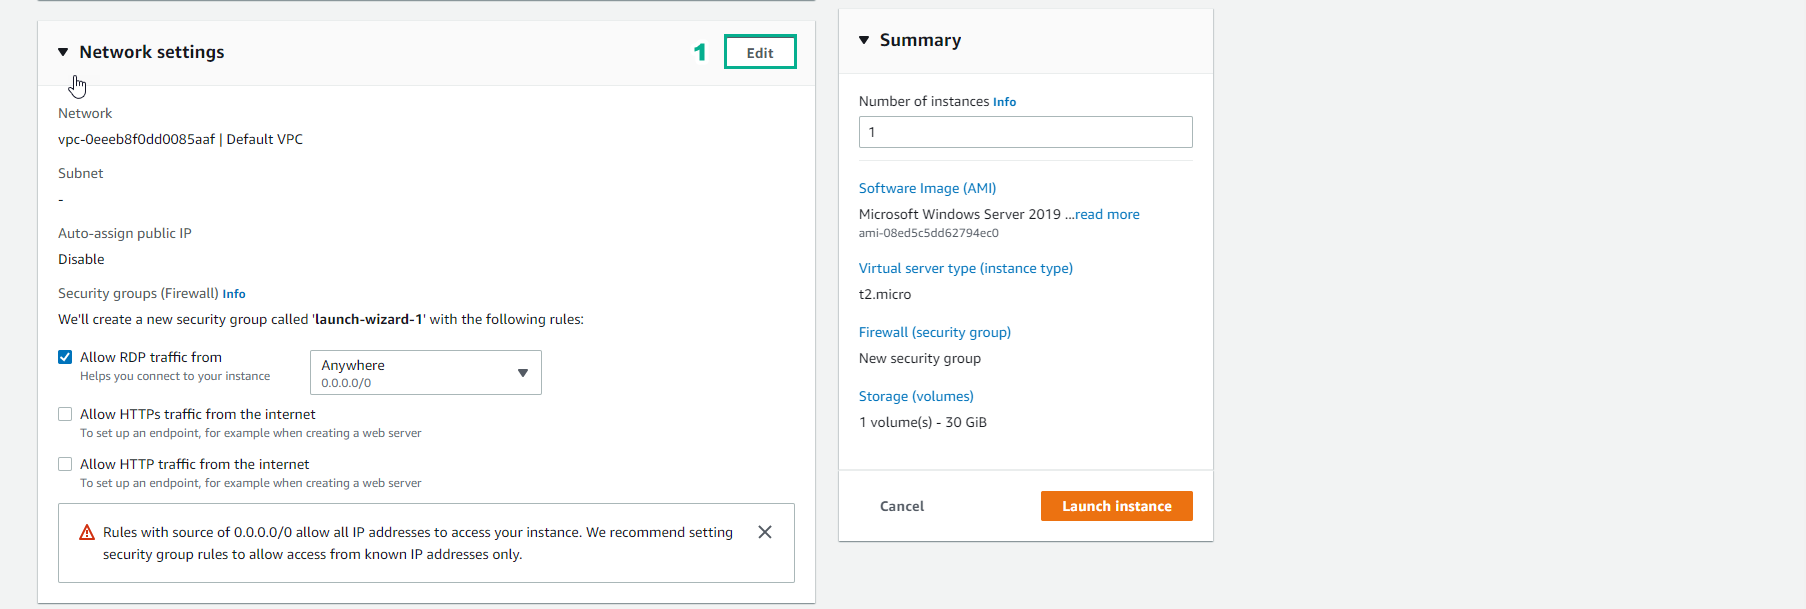
- Trong bước Network settings
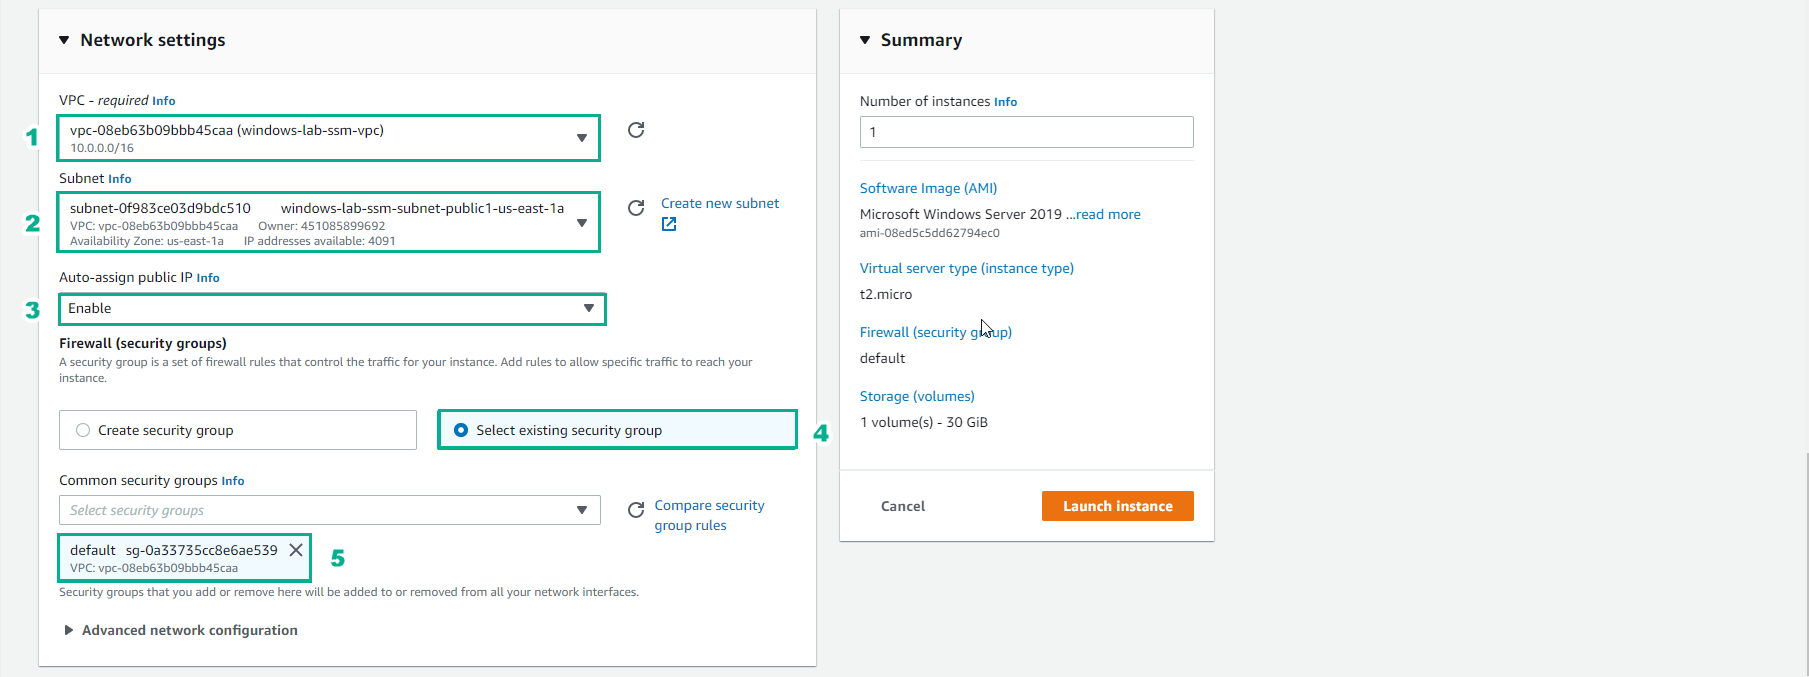
- Trong bước Networking settings
- VPC, chọn window-lab-smm-vpc
- Subnet, chọn window-lab-smm-public1-us-east-1a
- Auto-assign public IP, chọn Enable
- Firewall (security group), chọn Select existing security group
- Chọn Security group default
- Trong bước Summary
- Number of instances, nhập 1
- Xem mô tả về instance
- Chọn Launch instance

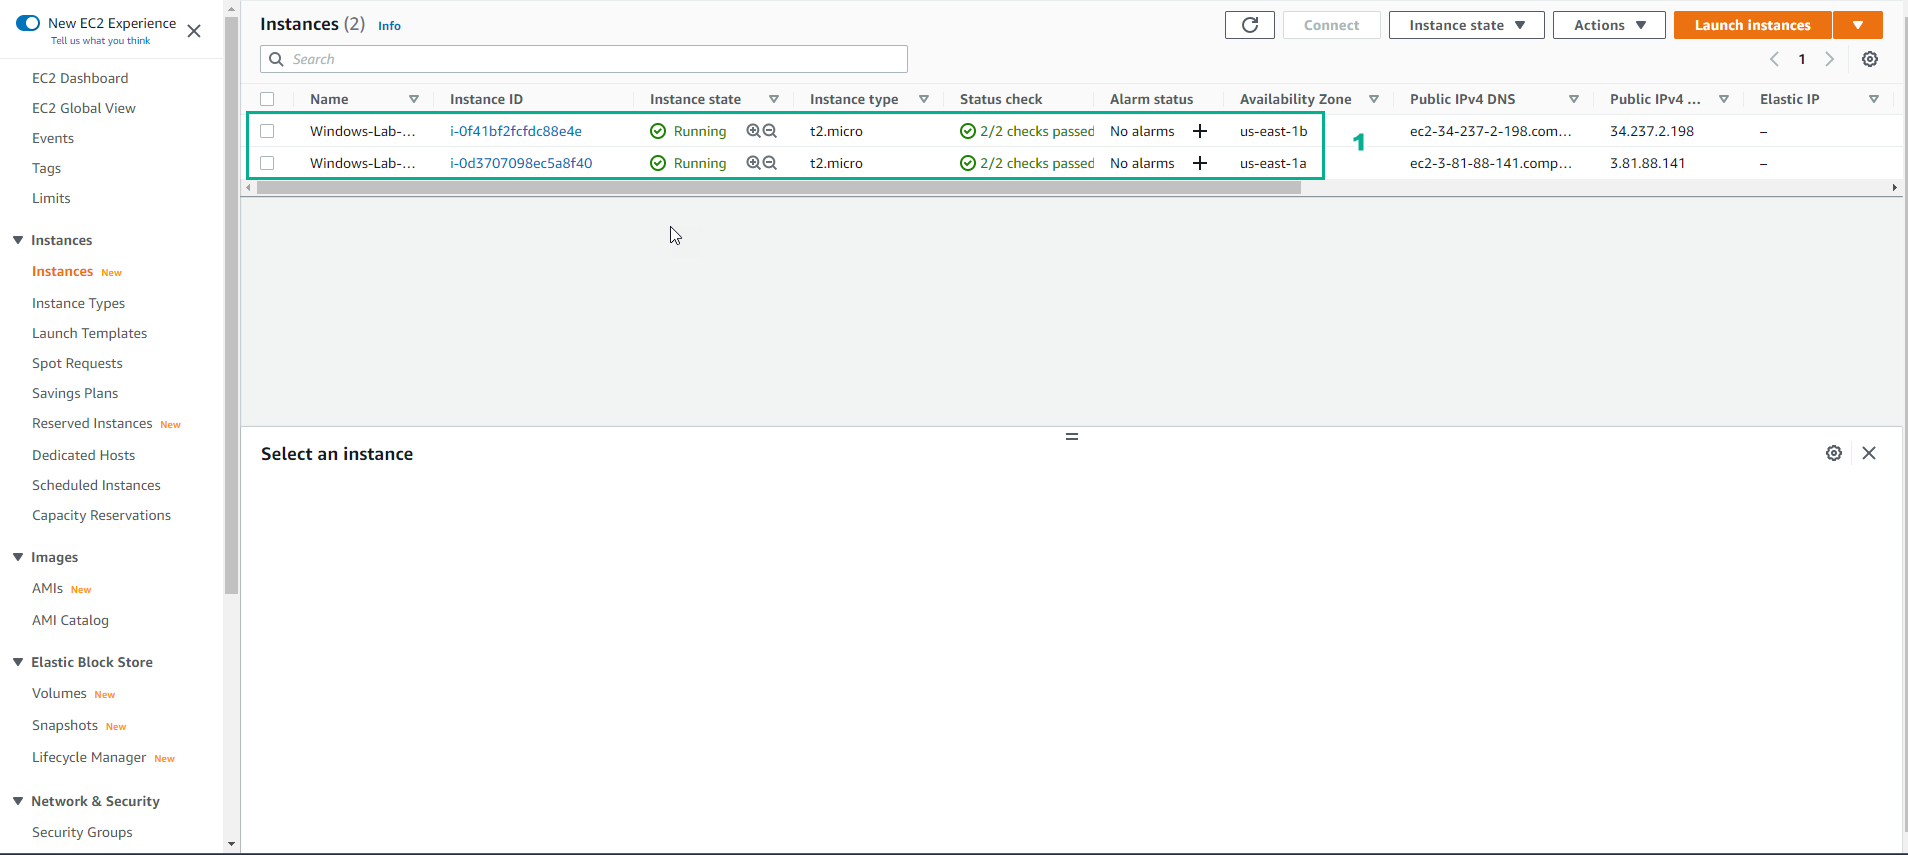
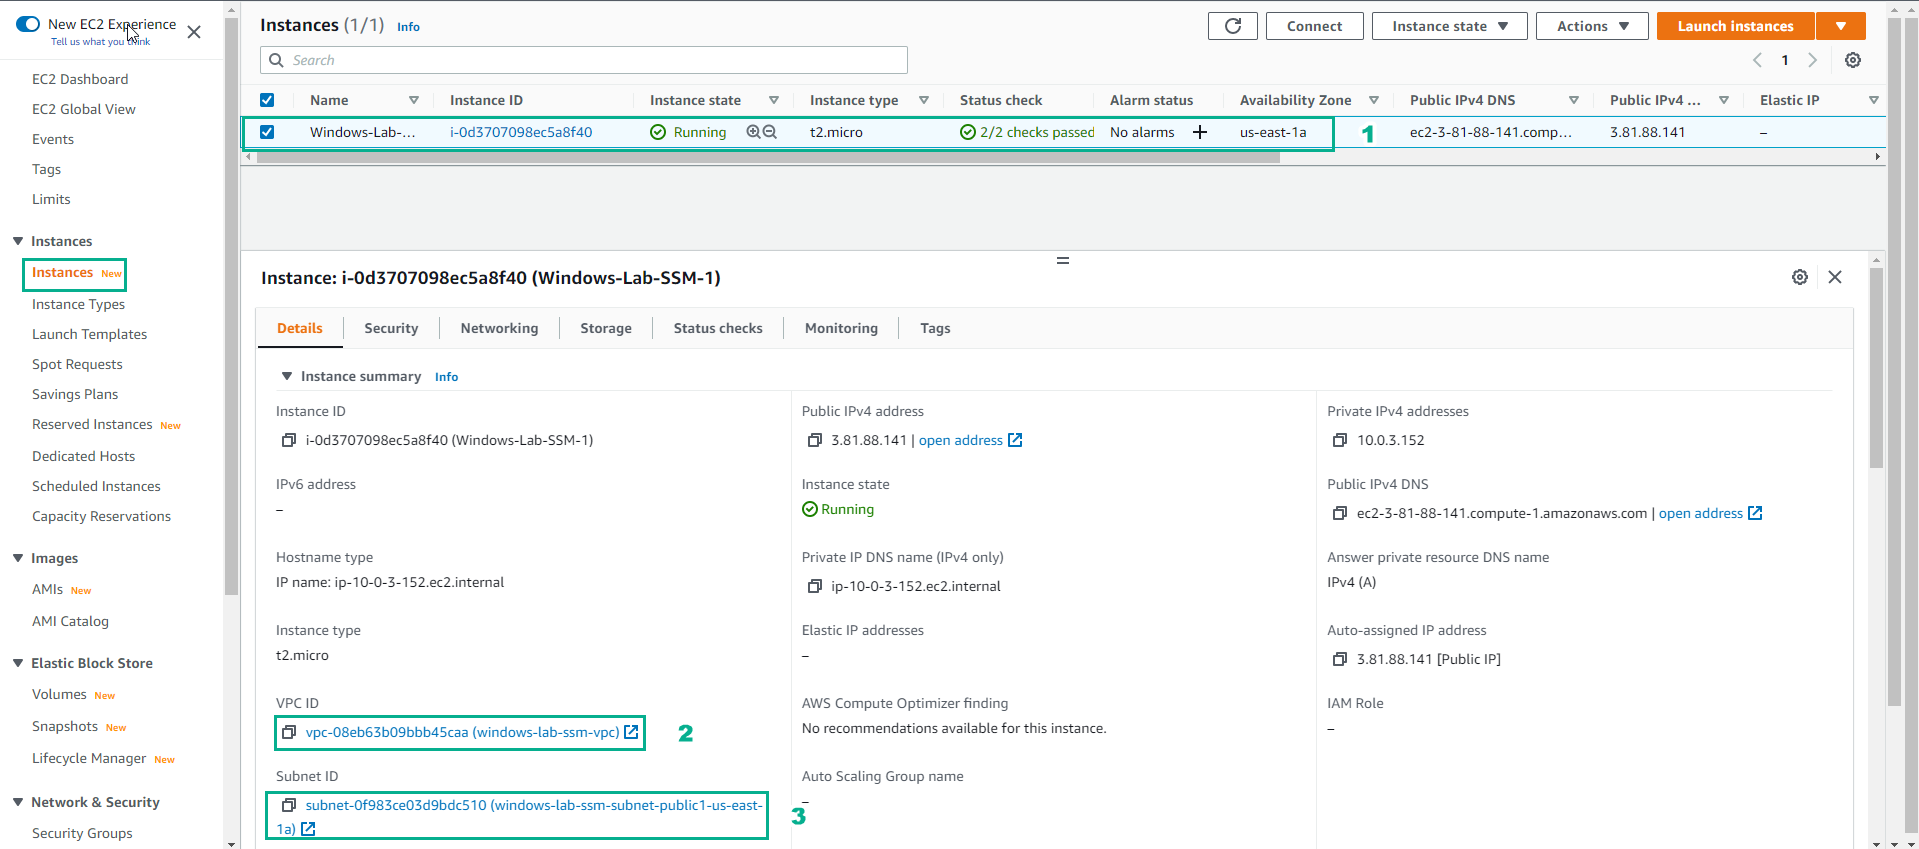
- Khởi tạo Instance thành công
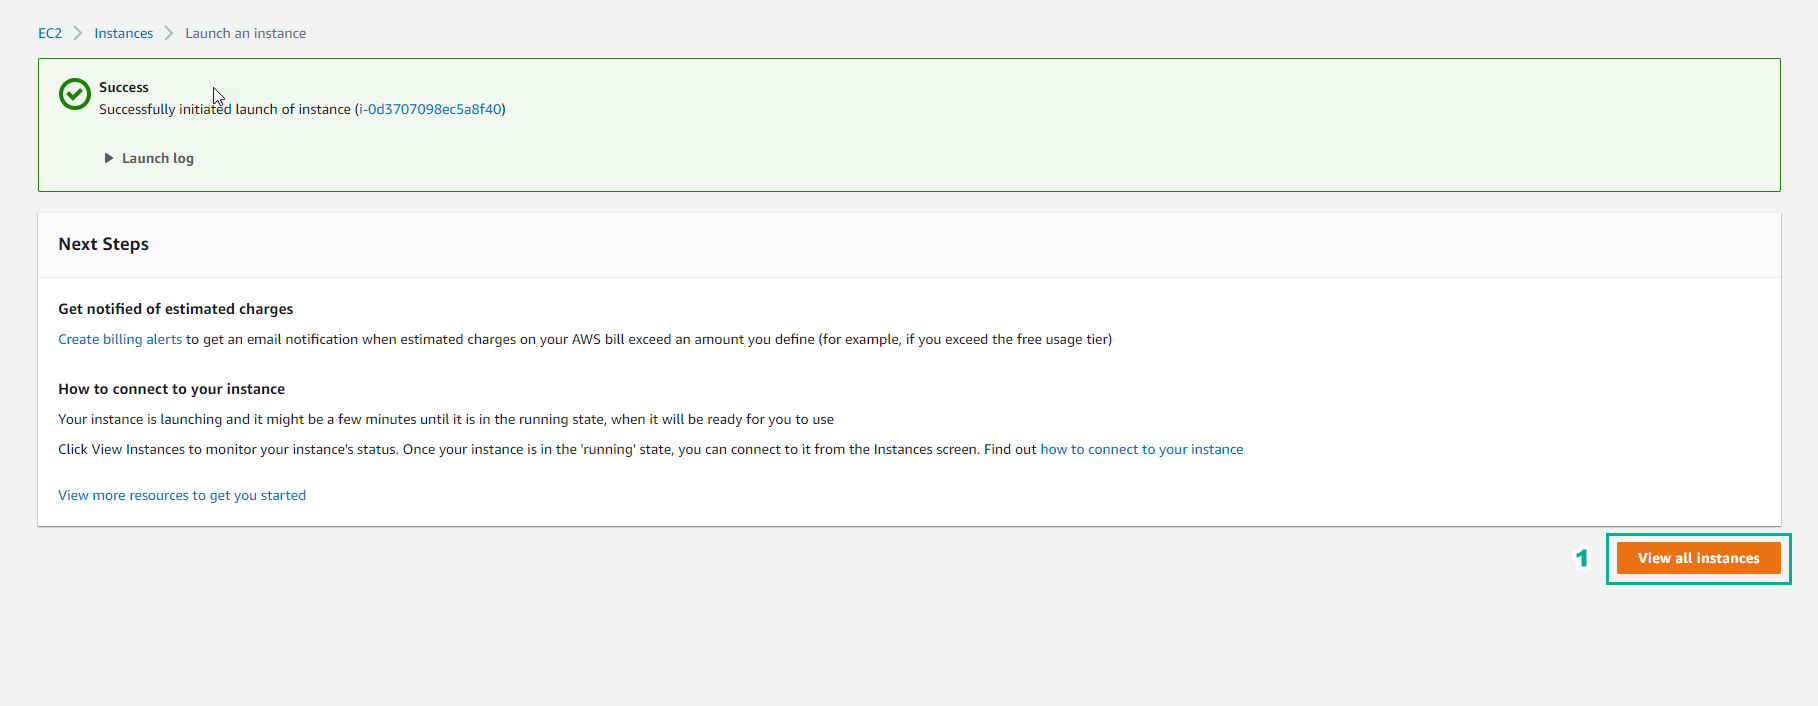
- Xem chi tiết instance vừa khởi tạo
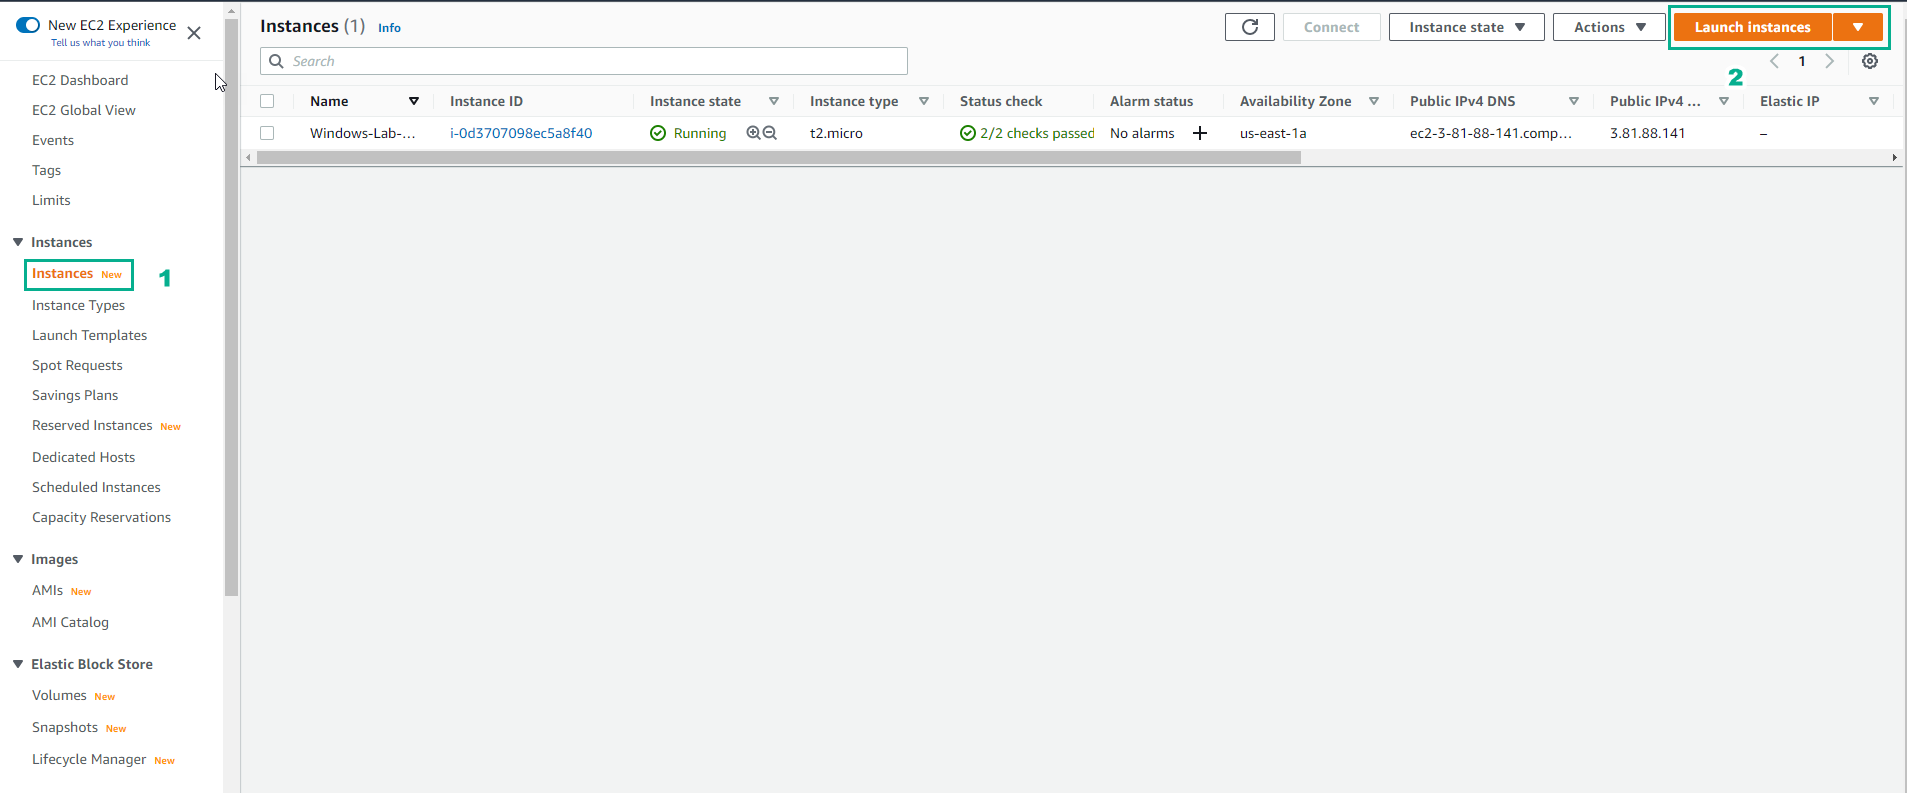
- Tương tự các khởi tạo Windows EC2 Instance
- Chọn Instances
- Chọn Launch instances
- Name and tags
- Trong giao diện Launch instance
- Chọn Quick Start
- Chọn Windows
- Chọn AMI
- Xem mô tả chi tiết
- Trong bước chọn Instance type và Create new key pair
- Chọn Instance type
- Chọn Create new key pair
- Trong bước Create key pair
- Key pair name, nhập
Windows-Lab-SSM-2-Key
- Private key file format, chọn .pem
- Chọn Create key pair
- Trong bước Network settings
- Trong giao diện Network settings
- VPC, chọn windows-lab-ssm-vpc
- Subnet, chọn windows-lab-smm-subnet-public2-us-east-1b
- Auto-assign public IP, chọn Enable
- Fire(Security group), chọn Select existing security group
- Chọn security group default
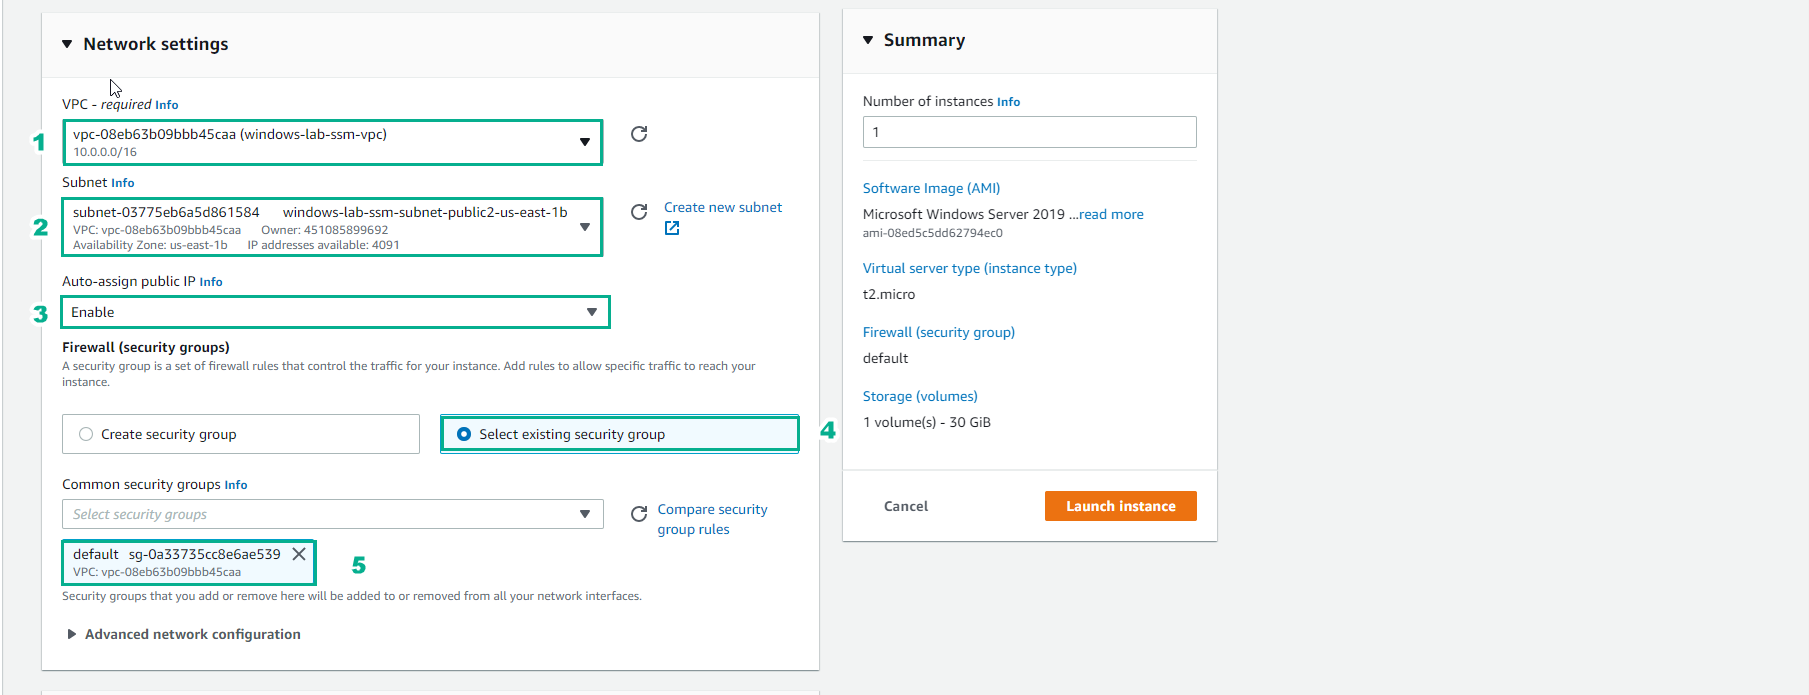
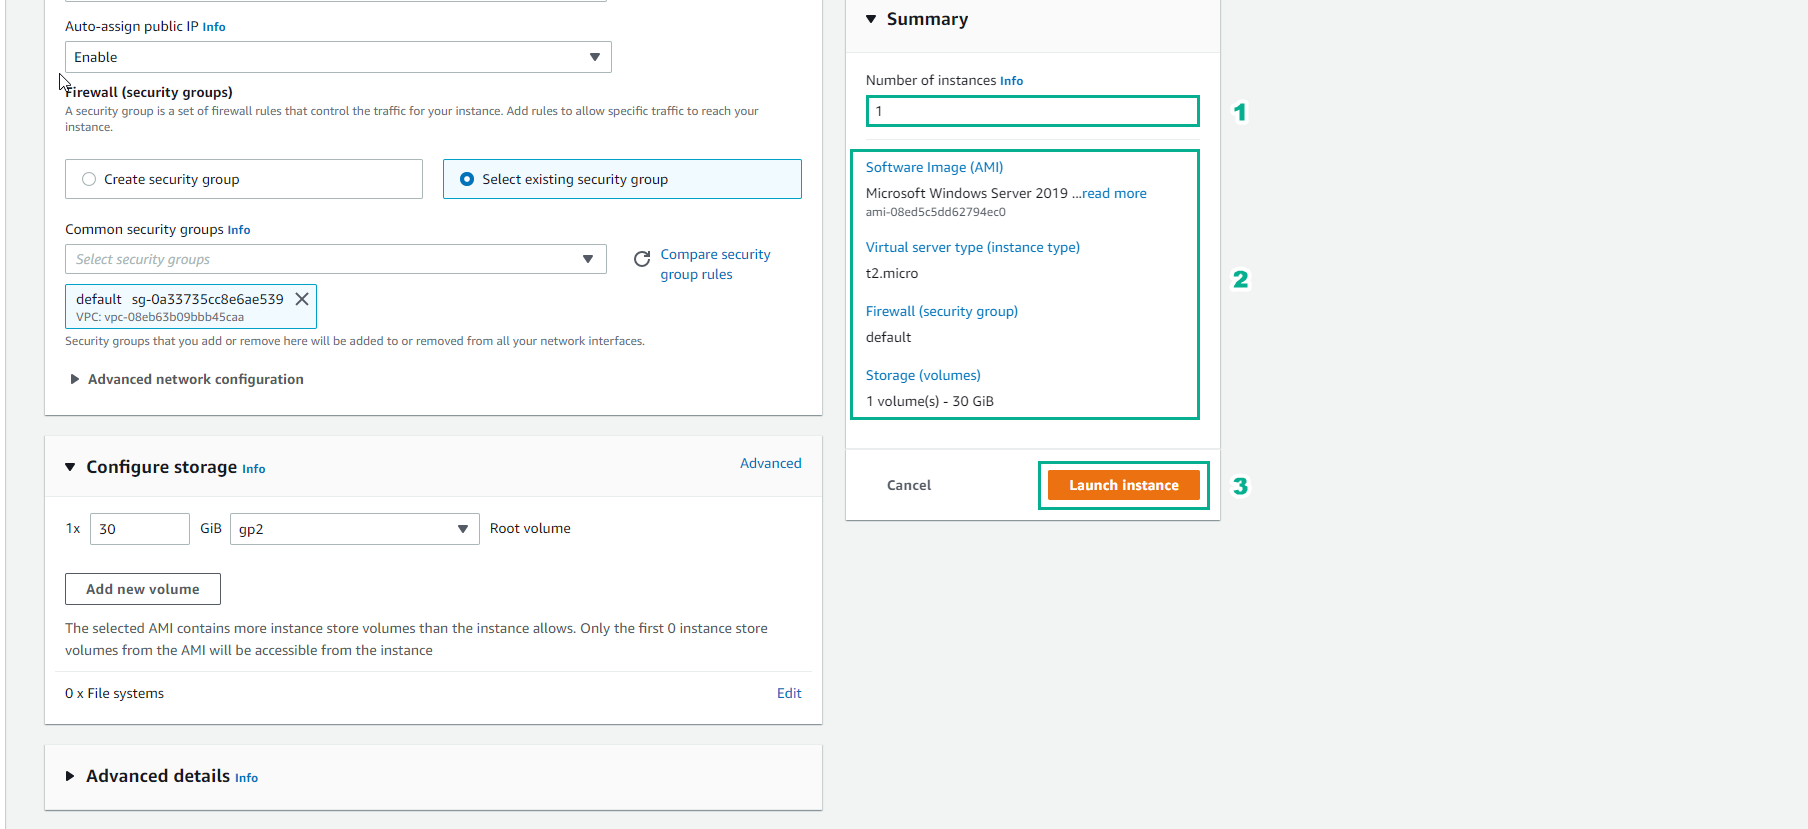
- Trong phần Summary
- Number of instances, nhập 1
- Xem thông tin về instance
- Chọn Launch instances
- Khởi tạo instance thành công
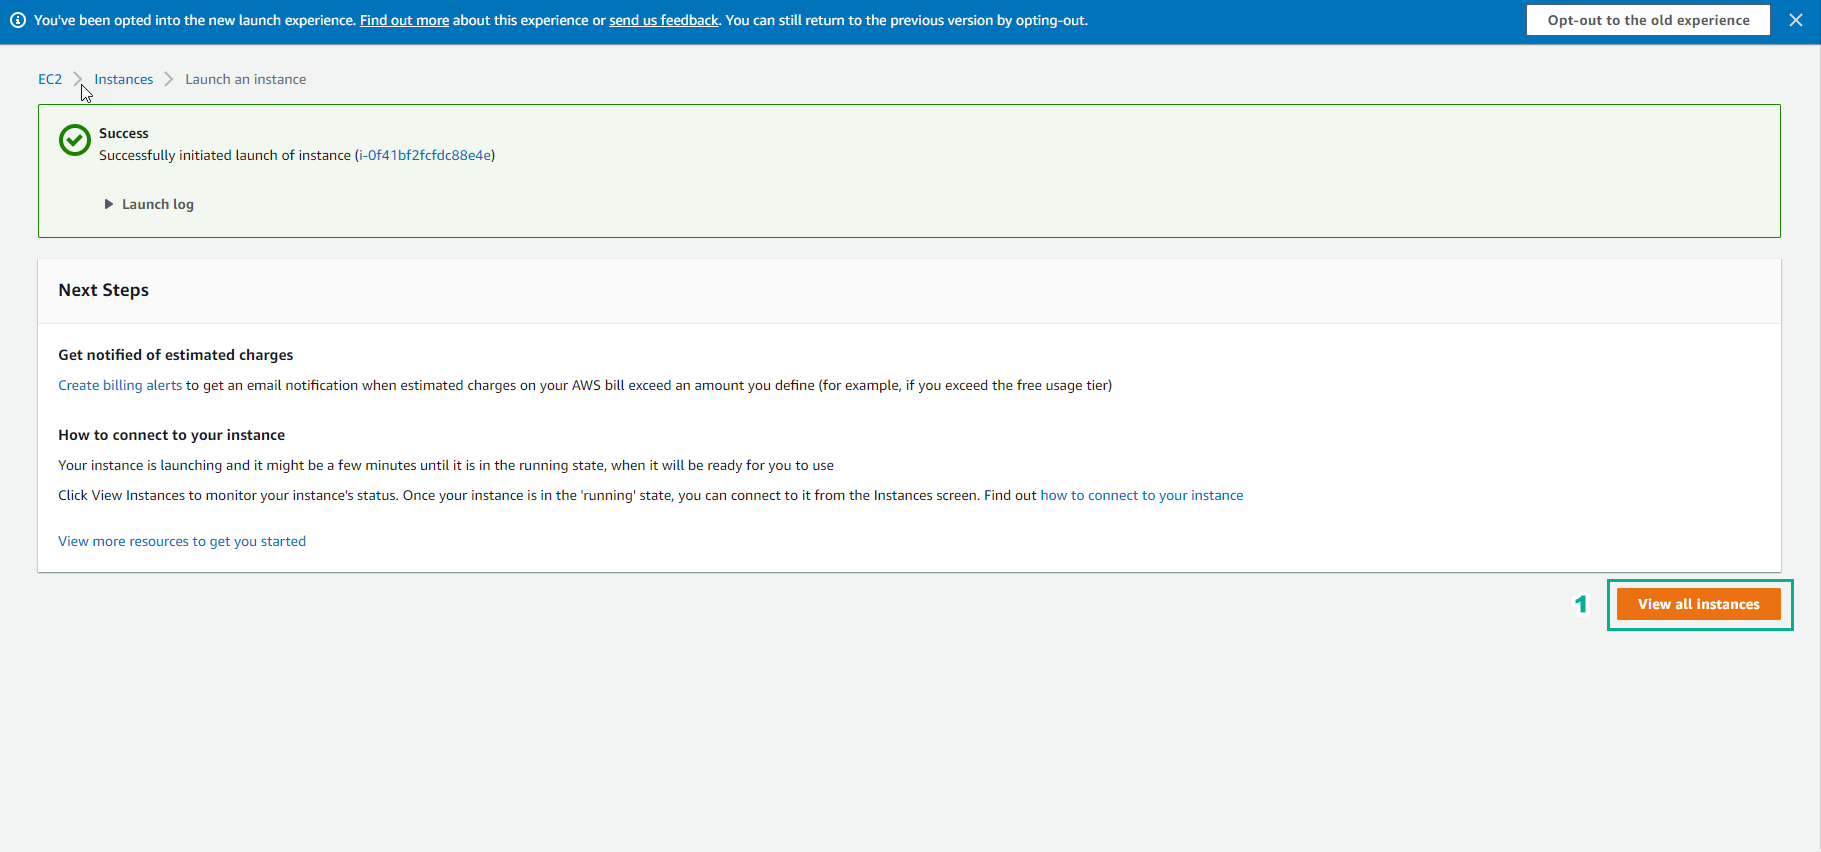
- Vậy là chúng ta hoàn thành khởi tạo 2 Windows EC2 Instance